Subaru Crosstrek Service Manual: Removal
SECURITY AND LOCKS > Front Outer Handle
REMOVAL
1. Raise the glass assembly - front door to the top position.
2. Disconnect the ground cable from battery and wait for at least 60 seconds before starting work. NOTE">
3. Remove the trim panel - front door. Door Trim > REMOVAL">
4. Remove the sealing cover - front door. Front Sealing Cover > REMOVAL">
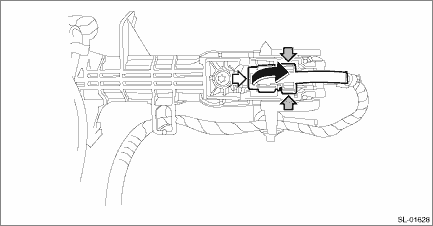
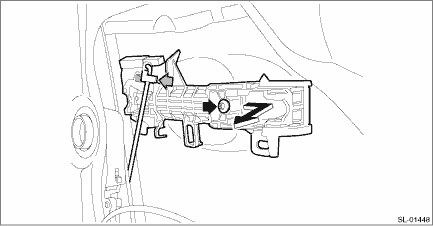
5. Remove the holder of the frame assembly - front door outer.

NOTE:
For model with keyless access with push button start, disconnect the harness clip and exterior antenna (touch sensor) connector.
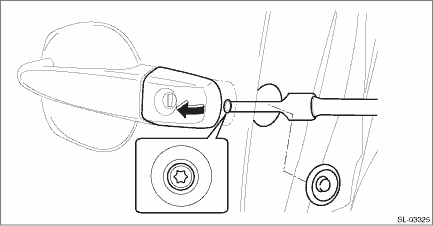
6. Remove the cover - handle front outer.
Preparation tool:
TORX® T30
(1) Remove the plug at the rear end of the panel assembly - front door.
(2) Loosen the TORX® bolt and remove the cover - handle front outer.
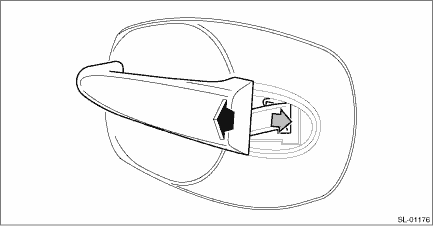
7. Remove the handle - door outer by moving it rearward.
CAUTION:
Do not apply excessive force to remove the handle - door outer from the panel assembly - front door. The panel assembly - front door may be deformed.
8. Remove the frame assembly - front door outer.
Preparation tool:
TORX® T30
(1) Remove the spacer - door handle outer.
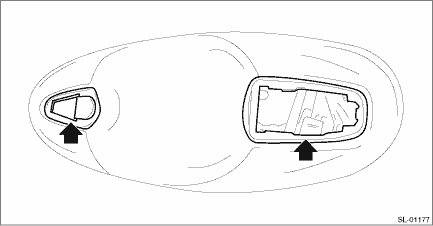
(2) Remove the rod from the rod clamp of the frame assembly - front door outer.
(3) Loosen the TORX® bolt and remove the frame assembly - front door outer from inside the panel assembly - front door.
 Inspection
SECURITY AND LOCKS > Front Outer HandleINSPECTIONCheck if the outer handle operates normally.• If the lever is faulty, replace the handle - door outer.• If the rod is deformed, replace ...
 Installation
SECURITY AND LOCKS > Front Outer HandleINSTALLATION1. Before installation, check the following items.• Rod is free from deformation.• Grease is applied sufficiently to rod joints.If gre ...
Other materials:
Inspection
PARKING BRAKE > Parking Brake Assembly (Rear Disc Brake)INSPECTION1. Measure the inner diameter of the rear disc rotor. If scoring or worn is found on the disc, replace the rear disc rotor.Disc rotor inner diameter:Specification: 170 mm (6.69 in)Service limit: 171 mm (6.73 in)2. Measure the linin ...
Disassembly
EMISSION CONTROL (AUX. EMISSION CONTROL DEVICES)(H4DO) > Drain SeparatorDISASSEMBLY1. Disconnect the drain tube (A) from the leak check valve assembly.NOTE:Disconnect the quick connector as shown in the figure.2. Lift up the claw (B) of the drain separator and slide the drain separator in the dir ...
Removal
GLASS/WINDOWS/MIRRORS > Rear Regulator and Motor AssemblyREMOVAL1. Disconnect the ground cable from battery. NOTE">2. Remove the trim panel - rear door. Door Trim > REMOVAL">3. Remove the sealing cover - rear door. Rear Sealing Cover > REMOVAL">4. Remove the glass ...
