Subaru Crosstrek Service Manual: Removal
SECURITY AND LOCKS > Rear Outer Handle
REMOVAL
1. Raise the glass assembly - rear door to the top position.
2. Disconnect the ground cable from battery. NOTE">
3. Remove the trim panel - rear door. Door Trim > REMOVAL">
4. Remove the sealing cover - rear door. Rear Sealing Cover > REMOVAL">
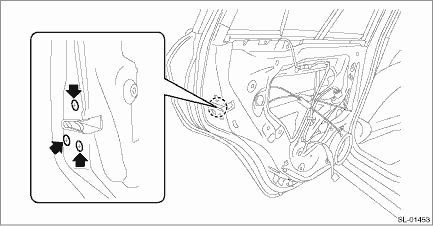
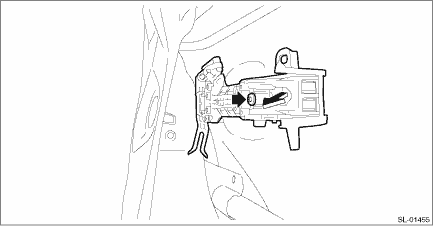
5. Remove the screws and move downward the latch & actuator assembly - rear.
CAUTION:
Do not re-use the screws. Always replace with a new part.
6. Remove the holder of the frame assembly - rear door outer.
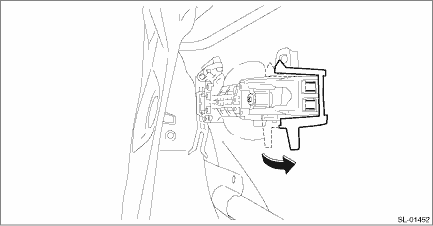
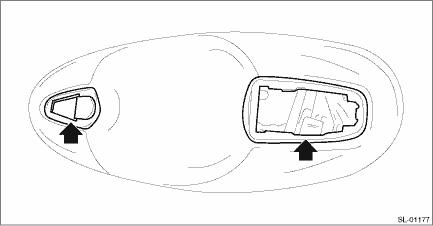
7. Remove the cover - handle rear outer.
Preparation tool:
TORX® T30
(1) Loosen the TORX® bolt.
(2) Release the claws, and then remove the cover - handle rear outer.
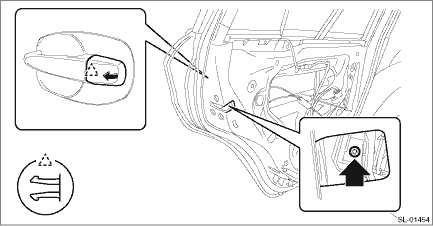
8. Remove the handle - door outer by moving it rearward.
CAUTION:
Do not apply excessive force to remove the handle - door outer from the panel assembly - rear door. The panel assembly - rear door may be deformed.
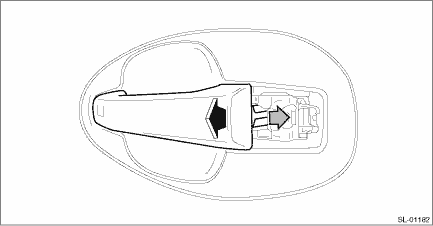
9. Remove the frame assembly - rear door outer.
Preparation tool:
TORX® T30
(1) Remove the spacer - door handle outer.
(2) Loosen the TORX® bolt and remove the frame assembly - rear door outer from inside the panel assembly - rear door.
 Inspection
SECURITY AND LOCKS > Rear Outer HandleINSPECTIONCheck if the outer handle operates normally.If the lever is faulty, replace the handle - door outer. ...
 Installation
SECURITY AND LOCKS > Rear Outer HandleINSTALLATION1. Before installation, check the following items.• Lever is free from deformation.• Grease is applied sufficiently to lever joints.If ...
Other materials:
Trailer towing
Your vehicle is designed and intended to
be used primarily as a passenger-carrying
vehicle. Towing a trailer puts additional
loads on your vehicle's engine, drivetrain,
brakes, tires and suspension and has an
adverse effect on fuel economy.
If you do decide to tow a trailer, your safety
and ...
Preparation
1. Turn off the ignition switch.
2. Close all doors (including rear gate).
3. Press and hold the " "
button on the
access key. All doors (including rear gate)
will then be locked.
4. Keep the " " button
pressed, and
press the rear lock button within 5
seconds after step ...
Selecting audible signal operation
The Subaru Ascent provides audible confirmation (electronic chirps) when locking
or unlocking the vehicle. This feature can be customized or disabled through the
center information display according to user preference.
Additionally, the volume level of the Subaru Ascent audible signal can be ad ...
