
Subaru Crosstrek Service Manual: Installation
MECHANICAL(H4DO) > V-belt
INSTALLATION
1. V-BELT
Install in the reverse order of removal.
CAUTION:
• When reusing the V-belt, wipe off dust and water with cloth.
• Do not use the V-belt if there is any oil, grease or coolant on the belt.
• Be careful not to rub the V-belt end surface with bare hands; exposed core may cause injury.
• Wipe off any dust, oil and water on the groove of each pulley with cloth.
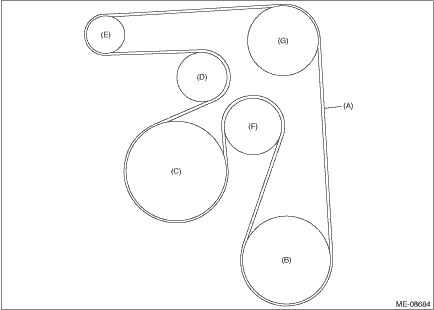
(A) | V-belt | (D) | V-belt tensioner ASSY | (G) | A/C compressor pulley |
(B) | Water pump pulley | (E) | Generator pulley | ||
(C) | Crank pulley | (F) | Idler pulley |
Tightening torque:
7 N·m (0.7 kgf-m, 5.2 ft-lb)
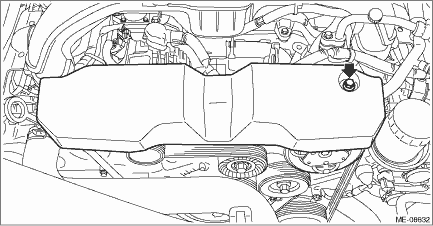
2. V-BELT TENSIONER ASSEMBLY AND IDLER PULLEY
1. Install the idler pulley to the chain cover.
NOTE:
When installing the idler pulley, be careful of the idler pulley cover direction.
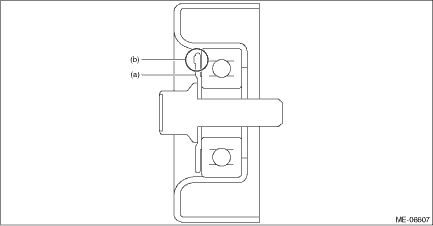
(a) | Idler pulley cover | (b) | Protrusion (3 places) |
Tightening torque:
36 N·m (3.7 kgf-m, 26.6 ft-lb)
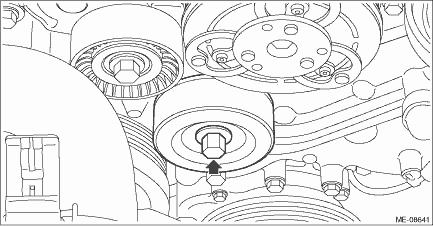
2. Install the V-belt tensioner assembly onto the generator bracket.
NOTE:
When installing the V-belt tensioner assembly, insert the protrusion of V-belt tensioner assembly into the hole for preventing rotation at the generator bracket.
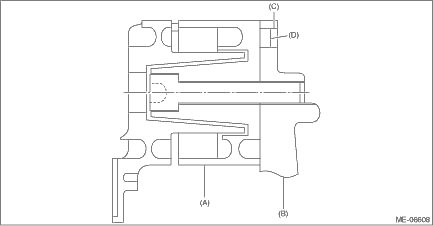
(A) | V-belt tensioner ASSY | (C) | Hole to prevent rotation | (D) | Protrusion portion |
(B) | Generator bracket |
Tightening torque:
25 N·m (2.5 kgf-m, 18.4 ft-lb)
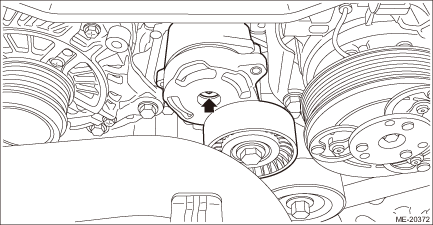
3. Install the cap to the V-belt tensioner assembly.
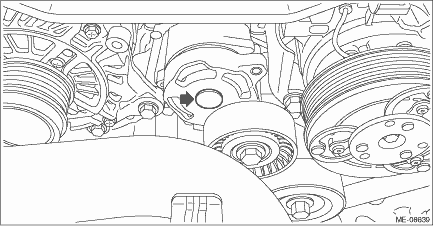
4. Install the V-belts.
 Removal
MECHANICAL(H4DO) > V-beltREMOVALNOTE:When replacing a single part, perform the work with the engine assembly installed to body.1. V-BELT1. When working on the vehicleNOTE:When working on the vehicl ...
 Compression Inspection
MECHANICAL(H4DO) > CompressionINSPECTIONCAUTION:After warming-up, engine becomes very hot. Be careful not to burn yourself during measurement.1. Turn the ignition switch to OFF.2. After warming-up ...
Other materials:
Ornament Installation
EXTERIOR/INTERIOR TRIM > OrnamentINSTALLATION1. LETTER MARKAlign the end of application tape with the end of panel, then adhere the letter mark.(a)Panel - rear gate end(b)Application tape end NOTE:• Align the cutout of application tape with the end reference of the front door. (a)• A ...
Dtc b16f3 front sub sensor lh recognition error
AIRBAG SYSTEM (DIAGNOSTICS) > Diagnostic Chart with Trouble CodeDTC B16F3 FRONT SUB SENSOR LH RECOGNITION ERRORDiagnosis start condition:Ignition voltage is 10 V to 16 V.DTC detecting condition:Front sub sensor (LH) is misinstalled.CAUTION:Before performing diagnosis, refer to “CAUTION&rdqu ...
Removal
BRAKE > Brake PipeREMOVALCAUTION:• Be careful of the following items. Failure to do so may cause the airbag system malfunction.– Yellow connectors and harnesses with yellow tapes around them are the connectors and harnesses for the airbag system. When using a tester on these circuits, fo ...
