Subaru Crosstrek Service Manual: Removal
SECURITY AND LOCKS > Starter Relay (Push Button Start)
REMOVAL
CAUTION:
Before handling the airbag system components, refer to “CAUTION” of “General Description” in “AIRBAG SYSTEM”. General Description > CAUTION">
1. Disconnect the ground cable from battery and wait for at least 60 seconds before starting work. NOTE">
2. Remove the cover assembly - instrument panel LWR driver. Instrument Panel Lower Cover > REMOVAL">
3. Remove the knee airbag module. Knee Airbag Module > REMOVAL">
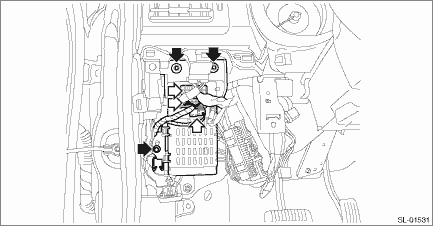
4. Release the lock and remove the fuse holder.
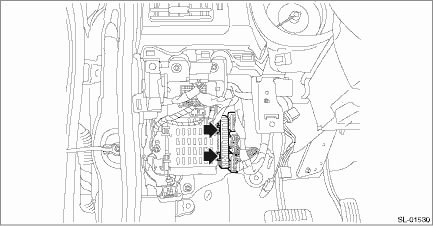
5. Remove the relay & fuse box.
(1) Disconnect the connector.
(2) Remove the bolts and nuts, and remove the relay & fuse box.
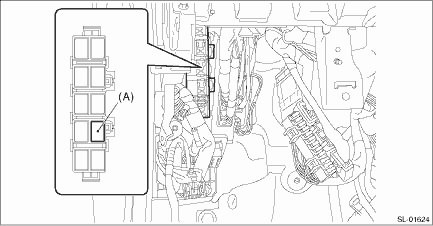
6. Remove the starter relay (push button start) (A) from the relay holder.
 Inspection
SECURITY AND LOCKS > Starter Relay (Push Button Start)INSPECTIONRefer to “CHECK RELAY” in “Relay and Fuse”. Relay and Fuse > INSPECTION"> ...
 Installation
SECURITY AND LOCKS > Starter Relay (Push Button Start)INSTALLATIONCAUTION:Before handling the airbag system components, refer to “CAUTION” of “General Description” in &ldquo ...
Other materials:
Operation
INSTRUMENTATION/DRIVER INFO > Multi-function Display (MFD) SystemOPERATION1. DIAGNOSTIC MODE (HIGH GRADE TYPE ONLY)The settings of the multi-function display can be changed by performing the following procedures to display the diagnostic mode. To show the demonstration display only, refer to &ldq ...
Braking tips
WARNING
Never rest your foot on the brake
pedal while driving. This can cause
dangerous overheating of the
brakes and needless wear on the
brake pads and linings.
When the brakes get wet
When driving in rain or after washing the
vehicle, the brakes may get wet. As a
result, brake stopping d ...
Dtc b2815 power supply high voltage
EyeSight (DIAGNOSTICS) > Diagnostic Procedure with Diagnostic Trouble Code (DTC)DTC B2815 POWER SUPPLY HIGH VOLTAGEDetected when the status for the battery voltage of 16 V or more continues approximately for 5 seconds and is judged to be abnormally high voltage.Refer to DTC B2814 for DTC detectin ...
