Subaru Crosstrek Service Manual: Installation
CONTROL SYSTEMS > Select Cable
INSTALLATION
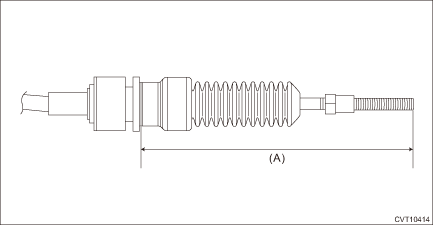
1. Position the select cable as shown in the figure, and install it to the plate assembly.
CAUTION:
• If the cable is installed in the wrong direction, loosen the bracket bolts, and then reinstall the cable in the correct direction.
• Do not adjust the cable end direction by turning it forcibly to prevent the boot from being twisted.
Tightening torque:
18 N·m (1.8 kgf-m, 13.3 ft-lb)
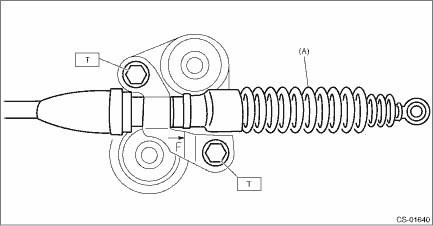
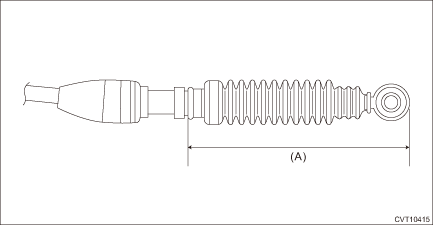
(A) | Select cable |
2. Install the select cable to the shifter arm.
3. Install the plate assembly to transmission.
Tightening torque:
T: 25 N·m (2.5 kgf-m, 18.4 ft-lb)
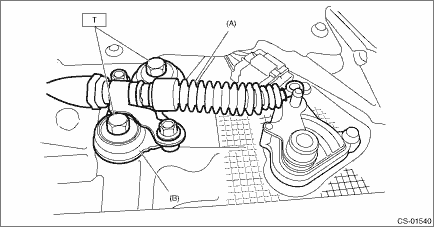
(A) | Select cable |
(B) | Plate ASSY |
4. Install the washer and snap pin to the shifter arm.
CAUTION:
Do not apply extra overload while holding the part (A).

(A) | Shifter arm |
(B) | Snap pin |
(C) | Select cable |
(D) | Washer |
5. Install new clamp paying attention to the installing direction.
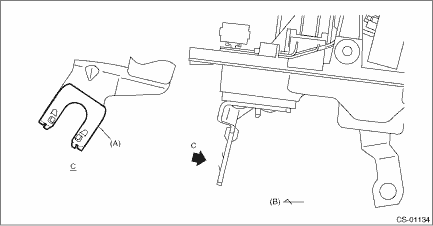
(A) | Clamp |
(B) | Forward |
6. Insert the tip of inner cable into connector hole of select lever, and fix the cable to bracket.
CAUTION:
Do not apply extra overload while holding the part (A).

7. Shift the select lever to the “N” range, and then adjust the select cable position. Select Cable > ADJUSTMENT">
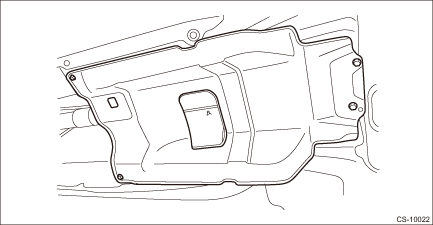
8. Install the center exhaust cover.
Tightening torque:
18 N·m (1.8 kgf-m, 13.3 ft-lb)
9. Install the center exhaust pipe. Center Exhaust Pipe > INSTALLATION">
10. Lower the vehicle.
11. Connect the battery ground terminal. NOTE">
 Inspection
CONTROL SYSTEMS > Select CableINSPECTIONCheck the removed cable and replace or adjust if damaged, rusty or malfunctioning.1. Check the cable for smooth operation.2. Check the inner cable for damage ...
 Select lever
...
Other materials:
Dtc c0071 steer angle sensor op
VEHICLE DYNAMICS CONTROL (VDC) (DIAGNOSTICS) > Diagnostic Procedure with Diagnostic Trouble Code (DTC)DTC C0071 STEER ANGLE SENSOR OPDTC detecting condition:Steering angle sensor output is faulty.Trouble symptom:• VDC does not operate.• EyeSight does not operate.Wiring diagram:Vehicle ...
Wiring diagram
ENTERTAINMENT > Navigation SystemWIRING DIAGRAMRefer to “Navigation System” in the wiring diagram.• Model without telematics: Navigation System > WIRING DIAGRAM">• Model with telematics: Navigation System > WIRING DIAGRAM"> ...
Removal
CONTINUOUSLY VARIABLE TRANSMISSION(TR580) > Converter CaseREMOVAL1. Remove the transmission assembly from the vehicle. Automatic Transmission Assembly > REMOVAL">2. Remove the air breather hose. Air Breather Hose > REMOVAL">3. Remove the control valve body. Control Valve ...
