Subaru Crosstrek Service Manual: Disassembly
CONTINUOUSLY VARIABLE TRANSMISSION(TR580) > Drive Pinion Shaft Assembly
DISASSEMBLY
1. Flatten the tab of the lock nut.
2. Using ST1, ST2 and ST3, fix at the spline portion of drive pinion shaft to remove the lock nut.
| ST1 499787500 | ADAPTER |
| ST2 499787700 | WRENCH |
| ST3 498937110 | HOLDER |
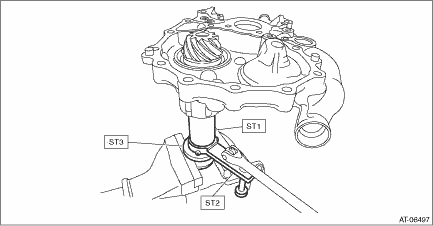
3. Remove the drive pinion shaft from the drive pinion retainer.

4. Using the round bar with diameter of 36 mm (1.42 in) or 37 mm (1.46 in), remove the bearing inner race and plug.
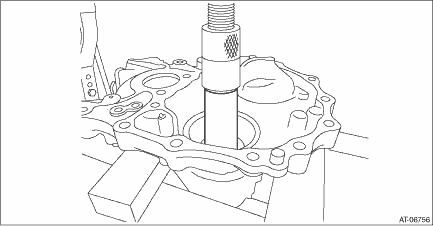
5. Remove the drive pinion washer.
6. Remove the drive pinion spacer.
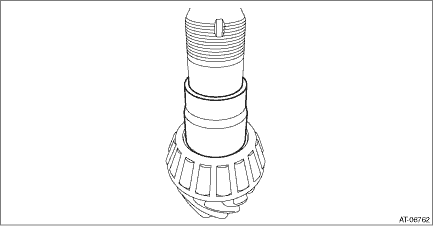
7. Remove the O-ring.
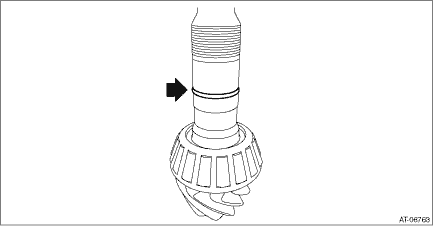
8. Remove the inner race and drive pinion shim from drive pinion shaft using ST.
| ST 498515500 | REMOVER |

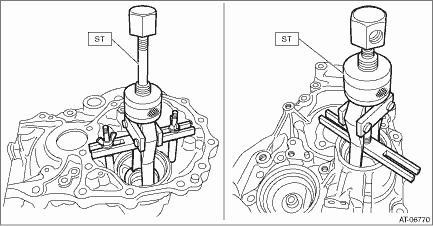
9. Using the ST, remove the outer race.
| ST 398527700 | PULLER ASSY |
10. Remove the two oil seals using a screwdriver wrapped with cloth etc.
CAUTION:
Do not damage the fitting surface of oil seal.

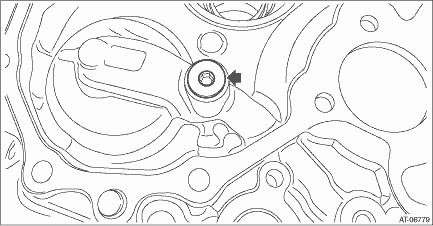
11. Remove the plug from drive pinion retainer.
 Assembly
CONTINUOUSLY VARIABLE TRANSMISSION(TR580) > Drive Pinion Shaft AssemblyASSEMBLY1. Install the plug to drive pinion retainer.NOTE:• Use new O-rings.• Apply CVTF to the O-rings.Tightening ...
 Inspection
CONTINUOUSLY VARIABLE TRANSMISSION(TR580) > Drive Pinion Shaft AssemblyINSPECTION• Make sure that all component parts are free of scratches, holes and other faults.• Check the tooth con ...
Other materials:
Dtc b1675 satellite safing sensor failure
AIRBAG SYSTEM (DIAGNOSTICS) > Diagnostic Chart with Trouble CodeDTC B1675 SATELLITE SAFING SENSOR FAILUREDiagnosis start condition:Ignition voltage is 10 V to 16 V.DTC detecting condition:• Satellite safing sensor is faulty.• Airbag control module is faulty.CAUTION:Before performing d ...
Note
SECURITY AND LOCKS > Body Integrated UnitNOTE1. REPLACE BODY INTEGRATED UNIT1. Check and record the current setting. Registration Body Integrated Unit > OPERATION">2. Prepare all immobilizer keys already registered. (Models without the keyless access with push button start)3. Replace ...
ahaTM by HARMAN
aha is a cloud-based application that
connects to the system and gives you
access to your favorite web content safely
and easily. There are over 30,000 stations
spanning internet radio, personalized music,
audiobooks, Facebook, Twitter, restaurant
and hotel searches, weather and
more. For mor ...
