Subaru Crosstrek Owners Manual: Screen OFF setting
1. Perform the preparation steps according to "Preparation for image quality and volume settings"

2. Operate the "
 " or "
 " switch to
select the "Screen Off" item. Then push
the
" switch to
select the "Screen Off" item. Then push
the
 button.
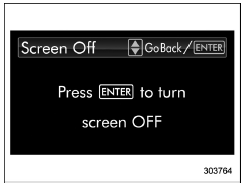
3. Push the
 button once more.

4. The screen is turned off.
Restoring the screen
When the " ", "
", "
 " or
" or
 button is
pushed after the ignition switch is turned
to the "ON" position, the screen will be
restored. The screen will be restored with
the basic screen that was displayed when
the screen was turned off. While the
screen is off, a warning message will be
displayed if necessary, but other screens
will not be displayed.
button is
pushed after the ignition switch is turned
to the "ON" position, the screen will be
restored. The screen will be restored with
the basic screen that was displayed when
the screen was turned off. While the
screen is off, a warning message will be
displayed if necessary, but other screens
will not be displayed.
 Contrast setting
1. Perform the preparation steps according
to "Preparation for image quality and
volume settings"
2. Operate the "
" or ""
switch to
select the "Contrast" item. Then push the
button.
...
 Beep volume setting
1. Perform the preparation steps according
to "Preparation for image quality and
volume settings"
2. Operate the "
" or "
" switch to
select the "Beep" item. Then push the
button.
...
Other materials:
Clear memory mode Operation
BODY CONTROL SYSTEM (DIAGNOSTICS) > Clear Memory ModeOPERATION1. On «Start» display, select «Diagnosis».2. On «Vehicle selection» display, input the target vehicle information and select «Confirmed».3. On «Main Menu» display, select «Each System».4. On «Select System» display, selec ...
Installation
DIFFERENTIALS > Rear Differential Front MemberINSTALLATION1. Install the rear differential front member, and temporarily attach and tighten a new self-locking nut.2. Remove the transmission jack.3. Tighten the self-locking nut.Tightening torque:T1: 50 N·m (5.1 kgf-m, 36.9 ft-lb)T2: 110 N&m ...
Dtc p2401 evap system leak detection pump control circuit low
ENGINE (DIAGNOSTICS)(H4DO) > Diagnostic Procedure with Diagnostic Trouble Code (DTC)DTC P2401 EVAP SYSTEM LEAK DETECTION PUMP CONTROL CIRCUIT LOWDTC detecting condition:Immediately at fault recognitionCAUTION:After servicing or replacing faulty parts, perform Clear Memory Mode Clear Memory Mode ...
