Subaru Crosstrek Owners Manual: Replacement of brake pad and lining
The disc brakes have audible wear indicators on the brake pads. If the brake pads wear close to their service limit, the wear indicator makes a very audible scraping noise when the brake pedal is applied.
If you hear this scraping noise each time you apply the brake pedal, have the brake pads serviced by your SUBARU dealer as soon as possible.
CAUTION
If you continue to drive despite the scraping noise from the audible brake pad wear indicator, it will result in the need for costly brake rotor repair or replacement.
Breaking-in of new brake pads and linings
When replacing the brake pad or lining, use only genuine SUBARU parts. After replacement, the new parts must be broken in as follows.
- Brake pad and lining
While maintaining a speed of 30 to 40 mph (50 to 65 km/h), step on the brake pedal lightly. Repeat this five or more times.
- Parking brake lining
1. Drive the vehicle at a speed of approximately 22 mph (35 km/h).
2. With the parking brake release button pushed in, pull the parking brake lever SLOWLY and GENTLY (pulling with a force of approximately 33.7 lbf [150 N, 15.3 kgf]).
3. Drive the vehicle for approximately 220 yards (200 meters) in this condition.
4. Wait 5 to 10 minutes for the parking brake to cool down. Repeat this procedure.
5. Check the parking brake stroke. If the parking brake stroke is out of the specified range, adjust it by turning the adjusting nut located on the parking brake lever.
Parking brake stroke: 7 - 8 notches / 45 lbf (200 N, 20.4 kgf)
WARNING
A safe location and situation should be selected for break-in driving.
CAUTION
Pulling the parking brake lever too forcefully may cause the rear wheels to lock. To avoid this, be certain to pull the lever up slowly and gently.
 Hill start assist system
Ensure that the Hill start assist system
operates properly under the following
circumstances.
1. Stop the vehicle on an uphill grade by
depressing the brake pedal (all models)
and clutch pedal ...
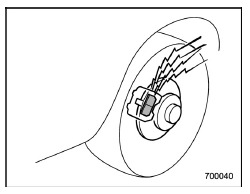
 Parking brake stroke
Check the parking brake stroke according
to the maintenance schedule in the
"Warranty and Maintenance Booklet".
When the parking brake is properly
adjusted, braking power is fully applied
b ...
Other materials:
Electrical component location Location
BODY CONTROL SYSTEM (DIAGNOSTICS) > Electrical Component LocationLOCATION(1)Body integrated unit(2)Data link connector ...
Removal
FUEL INJECTION (FUEL SYSTEMS)(H4DO) > Engine Coolant Temperature SensorREMOVAL1. Disconnect the ground cable from battery.2. Drain engine coolant. Engine Coolant > REPLACEMENT">3. Disconnect the connector (A) from the engine coolant temperature sensor, and remove the engine coolant te ...
Removal
EXTERIOR/INTERIOR TRIM > Cowl PanelREMOVAL1. Open the front hood.2. Remove the arm assembly - windshield wiper. Front Wiper Arm > REMOVAL">3. Remove the cowl panel - side.(1) Remove the clips.(2) Release the claws, and then remove the cowl panel - side.CAUTION:Pulling with excessive f ...
