Subaru Crosstrek Service Manual: Removal
SECURITY AND LOCKS > Body Integrated Unit
REMOVAL
CAUTION:
Before handling the airbag system components, refer to “CAUTION” of “General Description” in “AIRBAG SYSTEM”. General Description > CAUTION">
1. Disconnect the ground cable from battery and wait for at least 60 seconds before starting work. NOTE">
2. Remove the cover assembly - instrument panel LWR driver. Instrument Panel Lower Cover > REMOVAL">
3. Remove the knee airbag module. Knee Airbag Module > REMOVAL">
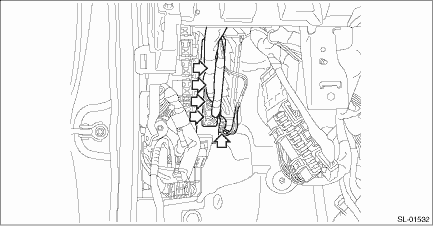
4. Release the lock and remove the fuse holder.
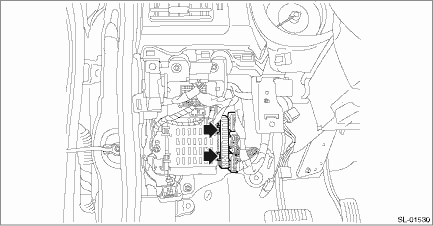
5. Remove the relay & fuse box.
(1) Disconnect the connector.
(2) Remove the bolts and nuts, and remove the relay & fuse box.

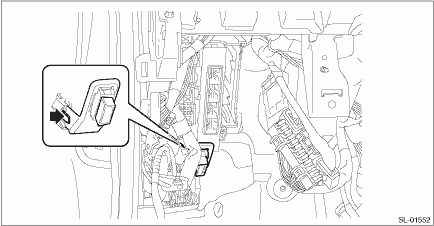
6. Remove the body integrated unit.
CAUTION:
Be careful to keep water and other foreign materials away from body integrated unit terminals.
(1) Disconnect the connector.
(2) Release the lock, and remove the data link connector bracket from the bracket.
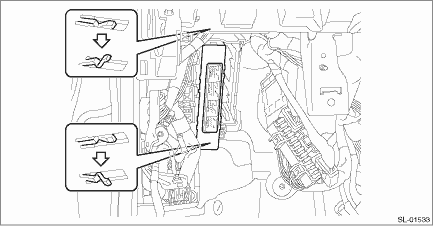
(3) Release the claws, and pull out the body integrated unit from the bracket.
 Installation
SECURITY AND LOCKS > Body Integrated UnitINSTALLATIONCAUTION:• When the control module related to immobilizer has been replaced, be sure to perform the registration of immobilizer system. For ...
 Note
Note
SECURITY AND LOCKS > Body Integrated UnitNOTE1. REPLACE BODY INTEGRATED UNIT1. Check and record the current setting. Registration Body Integrated Unit > OPERATION">2. Prepare all immobi ...
Other materials:
Automatic Locking Retractor/Emergency Locking Retractor (ALR/ELR)
Each passenger's seatbelt has an Automatic
Locking Retractor/Emergency Locking
Retractor (ALR/ELR). The Automatic
Locking Retractor/Emergency Locking
Retractor normally functions as an Emergency
Locking Retractor (ELR). The ALR/
ELR has an additional locking mode
"Automatic Locking Retractor ...
How to use SUBARU STARLINK
1. Connect to the audio system. Use a
USB port for an iPhone or iPod touch and
Bluetooth for Android devices.
For details about connecting an
iPhone/iPod touch: Refer to "Connecting
and disconnecting a USB memory/
portable device"
For details about registering or connecting
an Androi ...
Removal
LIGHTING SYSTEM > Light Control SensorREMOVAL1. Disconnect the ground cable from battery. NOTE">2. Remove the sensor - automatic light.CAUTION:Be careful not to damage the sensors and interior trims when removing.(1) Release the connectors and claws, and remove the grille front defroster ...
