Subaru Crosstrek Service Manual: Removal
EXTERIOR/INTERIOR TRIM > Rear Quarter Trim
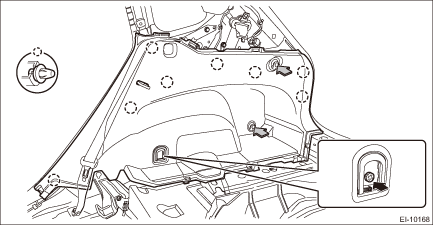
REMOVAL
1. CROSSTREK MODEL
CAUTION:
• Before handling the airbag system components, refer to “CAUTION” of “General Description” in “AIRBAG SYSTEM”. General Description > CAUTION">
• Airbag system satellite safing sensor is located in the lower of the rear seat cushion center. Be careful not to apply strong impact to the sensor when working with the rear seat cushion removed.
1. Disconnect the ground cable from battery and wait for at least 60 seconds before starting work. NOTE">
2. Remove the screws and clips, and remove the trim panel - rear quarter pillar UPR.
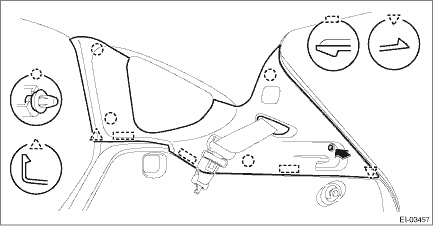
3. Remove the rear seat cushion assembly. Rear Seat > REMOVAL">
4. Release the clips and claws, and then remove the cover side sill - rear INN.
CAUTION:
Do not pull with excessive force. Doing so may damage the claws of the cover side sill - rear INN.
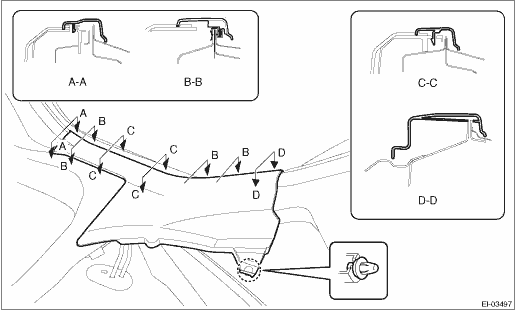
5. Remove the mat - rear floor CTR and the spacer - rear floor side.
6. Remove the clips, and remove the trim panel - rear skirt.
7. Remove the trim panel - rear apron.
(1) Remove the caps, and remove the bolts.
(2) Remove the screws.
(3) Disengage the clips, and remove the trim panel - rear apron.
NOTE:
For LH side, disconnect the connector of the luggage room light.
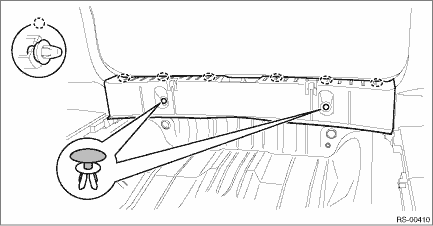
 Installation
EXTERIOR/INTERIOR TRIM > Rear Quarter TrimINSTALLATIONInstall each part in the reverse order of removal. ...
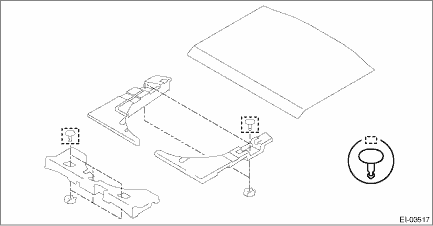
 Roof molding
...
Other materials:
Defogger setting
1. Perform the preparation steps according
to "Preparation for car settings"
2. Operate the " " or "
" switch to
select the "Defogger" item. Then push the
button.
3. The current setting will be displayed.
Push the button to enter the
selection
mode.
4. Select ...
Installation
SECURITY AND LOCKS > IG Relay1 (Push Button Start)INSTALLATIONCAUTION:Before handling the airbag system components, refer to “CAUTION” of “General Description” in “AIRBAG SYSTEM”. General Description > CAUTION">Install each part in the reverse order ...
Installation
EXTERIOR/INTERIOR TRIM > Cowl PanelINSTALLATIONCAUTION:Before installing the windshield glass and cowl panel, make sure there are no gravel in the installing area.1. Install the cowl panel assembly.CAUTION:If the cowl panel assembly cannot be installed properly, do not hit or set it forcibly. The ...
