Subaru Crosstrek Service Manual: Removal
EMISSION CONTROL (AUX. EMISSION CONTROL DEVICES)(H4DO) > Leak Check Valve Assembly
REMOVAL
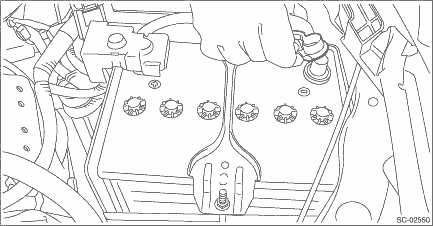
1. Disconnect the ground cable from battery.
2. Lift up the vehicle.
3. Remove the rear exhaust pipe. Rear Exhaust Pipe > REMOVAL">
4. Remove the propeller shaft. Propeller Shaft > REMOVAL">
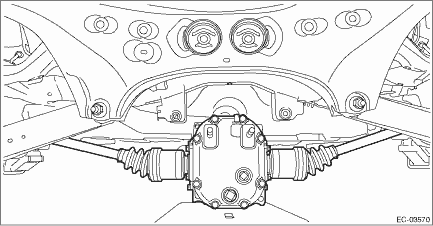
5. Support the rear differential with the transmission jack.
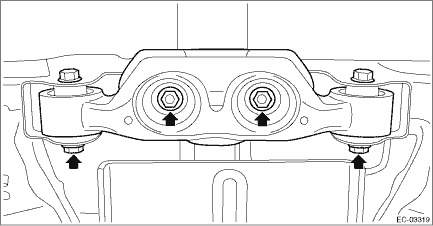
6. Remove the self-locking nuts which hold the rear differential to the rear sub frame assembly.
7. Remove the rear differential member from the rear sub frame assembly and the rear differential.
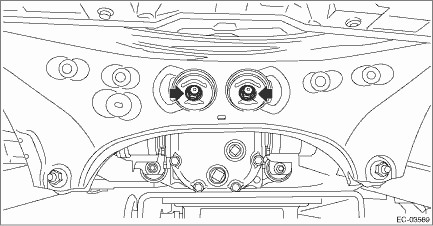
8. Lower the transmission jack gradually until the rear differential is at the position shown in the figure.
NOTE:
• When pulling out the stud bolt from the bushing portion of the rear sub frame assembly, adjust the angle and location of transmission jack and jack stand.
• Do not lower the rear differential excessively. Doing so may add extra load to the drive shaft or cause the falling-off of the drive shaft.
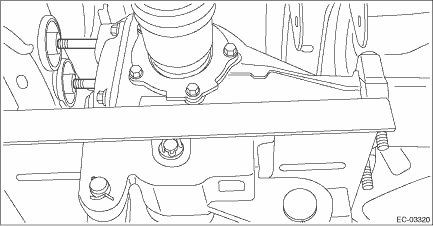
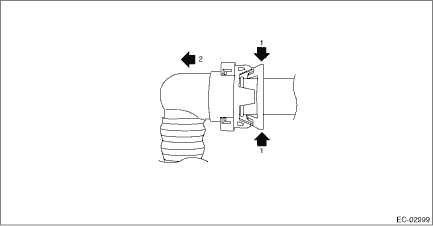
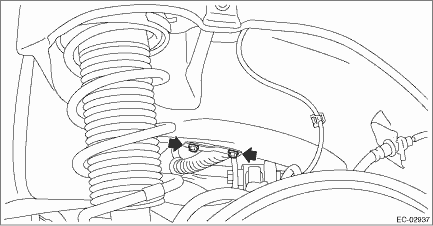
9. Disconnect the drain tube from the canister.
NOTE:
Disconnect the quick connector as shown in the figure.
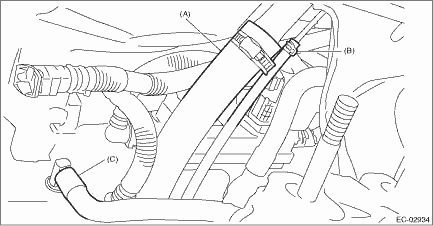
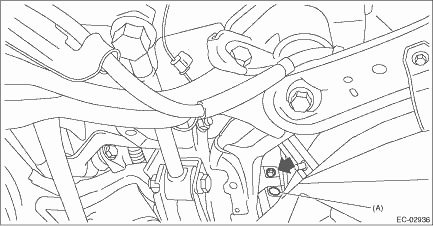
10. Disconnect the fuel filler hose (A) and evaporation hose (B).
11. Disconnect the intake hose (C) from the connector.
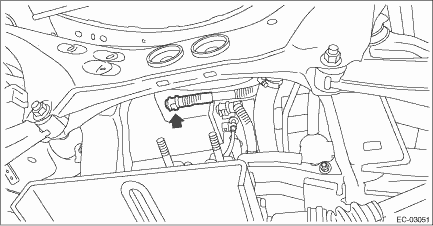
12. Disconnect the connector from the leak check valve assembly.
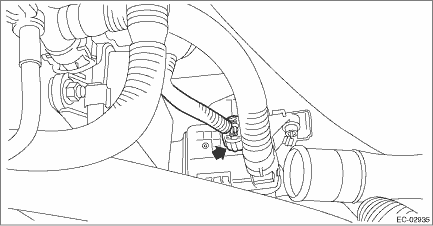
13. Remove the bolt and clip (A) which secure the leak check valve assembly to the vehicle, and remove the leak check valve assembly.
 Assembly
EMISSION CONTROL (AUX. EMISSION CONTROL DEVICES)(H4DO) > Leak Check Valve AssemblyASSEMBLY1. Install the bracket to the leak check valve assembly.Tightening torque:18 N·m (1.8 kgf-m, 13.3 ft ...
 Disassembly
EMISSION CONTROL (AUX. EMISSION CONTROL DEVICES)(H4DO) > Leak Check Valve AssemblyDISASSEMBLY1. Remove the drain separator from the leak check valve assembly. Drain Separator > REMOVAL"> ...
Other materials:
Memory function
The Subaru Ascent power rear gate is equipped with a convenient memory function
that allows you to store a preferred opening height for everyday use. This feature
is especially useful in garages or areas with limited vertical clearance.
Registration of the rear gate height
To set and save your ...
Basic inspection
WIRING SYSTEM > Basic Diagnostic ProcedureBASIC INSPECTION1. VOLTAGE MEASUREMENT1. Using a voltmeter, connect the negative lead to a good ground point or negative battery terminal and the positive lead to the connector or component terminal.2. Contact the positive lead of the voltmeter on connect ...
Electrical component location Location
KEYLESS ACCESS WITH PUSH BUTTON START SYSTEM (DIAGNOSTICS) > Electrical Component LocationLOCATION(1)Keyless access CM(8)Push button ignition switch(15)Rear interior antenna(2)Mechanical key(9)Steering lock CM(16)Rear gate opener button(3)Access key(10)TCM(17)Rear lock button(4)Front outer handle ...
