Subaru Crosstrek Owners Manual: Rear window wiper blade rubber
1. Pull out the end of the blade rubber assembly to unlock it from the plastic support.
2. Pull the blade rubber assembly out of the plastic support.
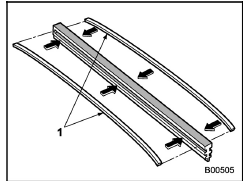
1) Metal spines
3. If the new blade rubber is not provided with two metal spines, remove the metal spines from the old blade rubber and install them in the new blade rubber.
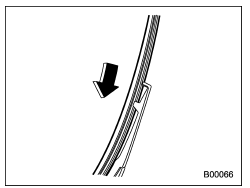
4. Align the claws of the plastic support with the grooves in the blade rubber assembly, then slide the blade rubber assembly into place.
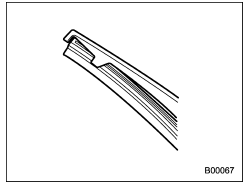
Securely retain both ends of the rubber with the stoppers on the plastic support ends. If the rubber is not retained properly, the wiper may scratch the rear window glass.
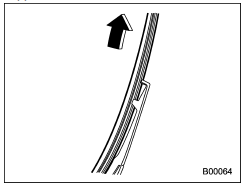
5. Install the wiper blade assembly to the wiper arm. Make sure that it locks in place.
6. Hold the wiper arm by hand and slowly lower it in position.
 Rear window wiper blade assembly
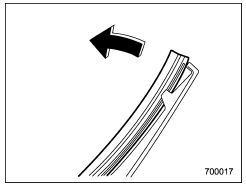
1. Raise the wiper arm off the rear
window.
2. Turn the wiper blade assembly counterclockwise.
3. Pull the wiper blade assembly toward
you to remove it from the wiper arm.
4. Install th ...
 Battery
WARNING
Before beginning work on or near
any battery, be sure to extinguish
all cigarettes, matches, and lighters.
Never expose a battery to an
open flame or electric sparks.
Batteri ...
Other materials:
List
HVAC SYSTEM (AUTO A/C) (DIAGNOSTICS) > Read Current DataLISTItems to be displayedUnit of measureContentsNoteIn-vehicle Sensor Temperature°C (°F)A/C control panel input value — Quantity of SunloadW/m2A/C control panel input value — Air conditioner pressure SWON/OFFA/C con ...
Real-time diagnosis Operation
EyeSight (DIAGNOSTICS) > Real-time DiagnosisOPERATION1. On «Start» display, select «Diagnosis».2. On «Vehicle selection» display, input the target vehicle information and select «Confirmed».3. On «Main Menu» display, select «Each System».4. On «Select System» display, select «EyeSi ...
Removal
EXTERIOR/INTERIOR TRIM > Rear Gate GarnishREMOVAL1. Disconnect the ground cable from battery. NOTE">2. Remove the trim panel - rear gate. Rear Gate Trim > REMOVAL">3. Remove the arm assembly - rear wiper.(1) Remove the cover - rear wiper arm.(2) Remove the nut, and remove the ...
