
Subaru Crosstrek Service Manual: Installation
DRIVE SHAFT SYSTEM > Front Hub Unit Bearing
INSTALLATION
1. Place the front brake back plate between the front axle housing and the front hub unit bearing, and tighten the bolt.
CAUTION:
• Do not get closer the tool which charged magnetism to magnetic encoder.
• Be careful not to damage the magnetic encoder.
• Use a new bolt.
Tightening torque:
65 N·m (6.6 kgf-m, 47.9 ft-lb)
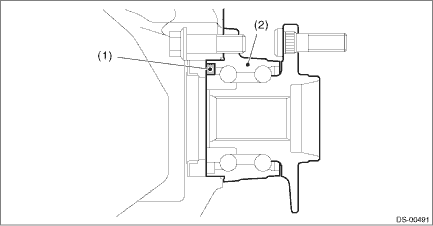
(1) | Magnetic encoder | (2) | Front hub unit bearing |
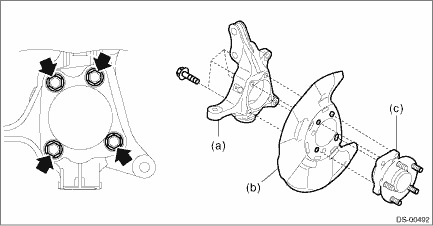
(a) | Front axle housing | (b) | Front brake back plate | (c) | Front hub unit bearing |
Tightening torque:
65 N·m (6.6 kgf-m, 47.9 ft-lb)
2. Install the front drive shaft assembly.
CAUTION:
• Do not hammer the drive shaft assembly when installing.
• Use new axle nuts.
(1) Insert the drive shaft assembly into the hub spline, and pull it into the specified position.
(2) Tighten the axle nut temporarily.
3. Install the disc rotor to the front hub unit bearing.
4. Install the caliper body assembly to the front axle housing.
Tightening torque:
Refer to “COMPONENT” of “General Description” for the tightening torque. General Description > COMPONENT">
5. Install the brake hose bracket.
Tightening torque:
33 N·m (3.4 kgf-m, 24.3 ft-lb)
6. Install the front ABS wheel speed sensor.
Tightening torque:
7.5 N·m (0.8 kgf-m, 5.5 ft-lb)
7. While pressing the brake pedal, tighten the new axle nuts to the specified torque.
CAUTION:
Do not load the front axle before tightening the axle nut. Doing so may damage the hub unit bearing.
Tightening torque:
220 N·m (22.4 kgf-m, 162.3 ft-lb)
8. After tightening the axle nut, lock it securely.
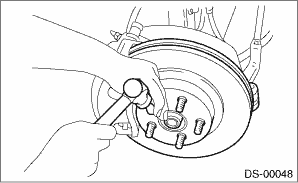
9. Install the front wheels, and perform the following inspections.
Tightening torque:
Except for C4 model: 120 N·m (12.2 kgf-m, 88.5 ft-lb)
C4 model: 100 N·m (10.2 kgf-m, 73.8 ft-lb)
(1) Check the wheels for smooth rotation.
(2) Check that there is no looseness by moving the upper and lower portions of front tire in an axial direction with the brake pedal released.
• Looseness exists > Check the front hub unit bearing. Front Hub Unit Bearing > INSPECTION">
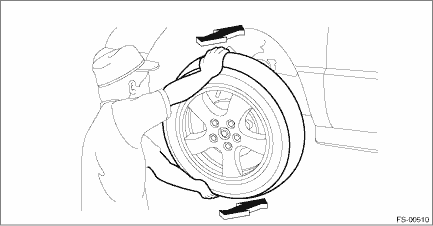
(3) Check that there is no looseness by moving the upper and lower portions of front tire in an axial direction with the brake pedal depressed.
• Looseness exists > Replace the ball joint assembly. Front Ball Joint > REMOVAL">
 Inspection
DRIVE SHAFT SYSTEM > Front Hub Unit BearingINSPECTION1. Moving the front tire up and down by hand, check there is no looseness in bearing, and check the wheel rotates smoothly.CAUTION:If there is u ...

Other materials:
Inspection
SECURITY AND LOCKS > Keyless Entry SystemINSPECTION1. SYMPTOM CHARTSymptomsRepair orderReferenceNone of the functions of the keyless entry system operate.1. Check the keyless transmitter battery. Keyless Entry System > INSPECTION">2. Remove and visually inspect the following fuses.&bul ...
Dtc b1863 short in driver s knee airbag (to +b)
AIRBAG SYSTEM (DIAGNOSTICS) > Diagnostic Chart with Trouble CodeDTC B1863 SHORT IN DRIVER’S KNEE AIRBAG (TO +B)Diagnosis start condition:Ignition voltage is 10 V to 16 V.DTC detecting condition:• Airbag main harness circuit is shorted to power supply.• Knee airbag module harness ...
Inspection
POWER ASSISTED SYSTEM (POWER STEERING) (DIAGNOSTICS) > Subaru Select MonitorINSPECTION1. COMMUNICATION FOR INITIALIZING IMPOSSIBLEDetecting condition:• Defective harness connector• Defective power steering control moduleTrouble symptom:• Communication is impossible between the p ...
