Subaru Crosstrek Service Manual: Installation
COOLING(H4DO) > Radiator
INSTALLATION
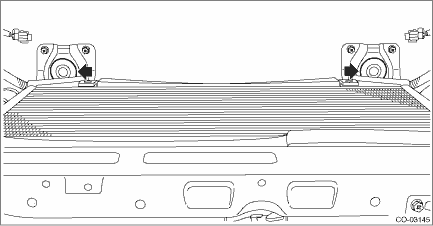
1. Attach the radiator lower cushion to the radiator lower bracket.
2. Install the radiator to vehicle.
NOTE:
Make pins on the lower side of radiator be fitted into the radiator lower cushions.
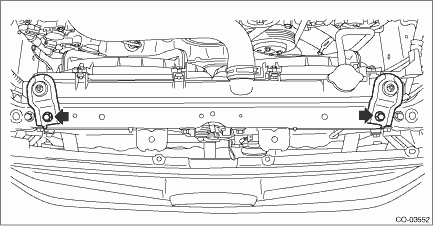
3. Install the radiator upper brackets.
Tightening torque:
12 N·m (1.2 kgf-m, 8.9 ft-lb)
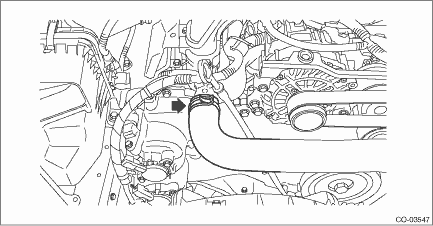
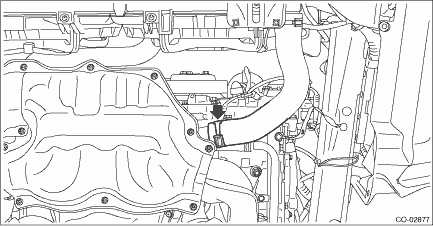
4. Connect the radiator inlet hose to the water pipe assembly.
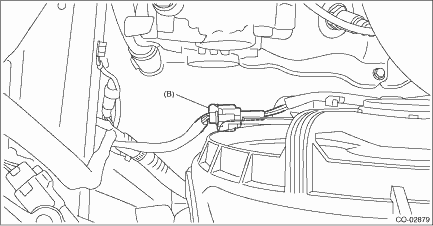
5. Connect the connector (A) to the main fan motor assembly and the connector (B) to the sub fan motor assembly.
6. Install the reservoir tank. Reservoir Tank > INSTALLATION">
7. Install the air intake duct. Air Intake Duct > INSTALLATION">
8. Lift up the vehicle.
9. Connect the radiator outlet hose to thermostat cover.
10. Install the under cover. Front Under Cover > INSTALLATION">
11. Lower the vehicle.
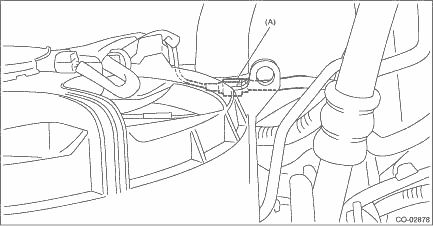
12. Attach the bracket - plate (A).
Tightening torque:
7.5 N·m (0.8 kgf-m, 5.5 ft-lb)
13. Attach the grille bracket.
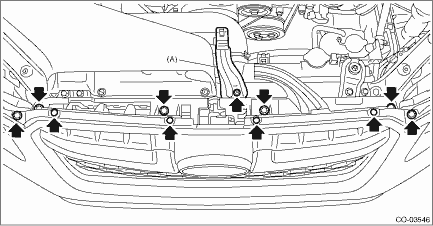
14. Install the V-belt cover.
Tightening torque:
7 N·m (0.7 kgf-m, 5.2 ft-lb)
15. Connect the battery ground terminal. NOTE">
16. Fill engine coolant. Engine Coolant > REPLACEMENT">
 Removal
COOLING(H4DO) > RadiatorREMOVALCAUTION:The radiator is pressurized when the engine and radiator are hot. Wait until engine and radiator cool down before working on the radiator.1. Disconnect the gr ...

Other materials:
List of diagnostic trouble code (dtc) List
KEYLESS ACCESS WITH PUSH BUTTON START SYSTEM (DIAGNOSTICS) > List of Diagnostic Trouble Code (DTC)LIST(1) Keyless access systemDTCItemContent of diagnosisNoteU0073CONTROL MODULE COMMUNICATION BUS OFFDetected when CAN line abnormality is detected. Diagnostic Procedure with Diagnostic Trouble Code ...
Assembly
STARTING/CHARGING SYSTEMS(H4DO) > StarterASSEMBLY1. Apply grease to the shaft sliding surfaces of the internal gear assembly.Grease:Multemp #6129 or equivalent2. Assemble the shaft to the internal gear assembly.3. Assemble the overrunning clutch as follows:(1) Apply grease to the spline portion o ...
Dtc c1731 g sensor abnormal
VEHICLE DYNAMICS CONTROL (VDC) (DIAGNOSTICS) > Diagnostic Procedure with Diagnostic Trouble Code (DTC)DTC C1731 G SENSOR ABNORMALNOTE:For the diagnostic procedure, refer to “DTC C1732 LATERAL G SENSOR”. Diagnostic Procedure with Diagnostic Trouble Code (DTC) > DTC C1732 LATERAL G ...
