Subaru Crosstrek Service Manual: Installation
INTAKE (INDUCTION)(H4DO) > Air Cleaner Case
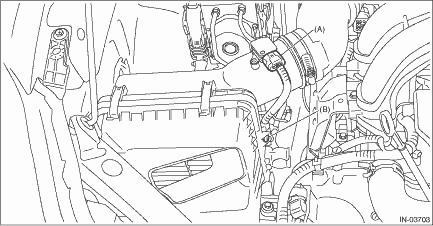
INSTALLATION
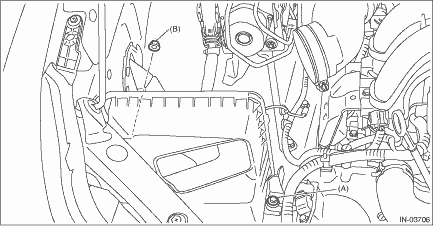
1. Install the bolt (A) and nut (B) which secure the air cleaner case (front) to the body.
Tightening torque:
Bolt (A)
6 N·m (0.6 kgf-m, 4.4 ft-lb)
Nut (B)
7.5 N·m (0.8 kgf-m, 5.5 ft-lb)
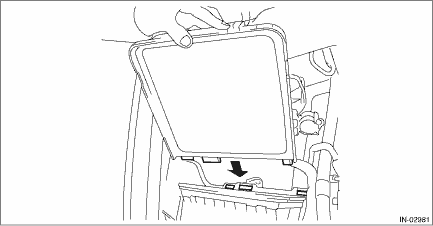
2. Install the air cleaner case (rear) and air cleaner element.
NOTE:
• Check that there is no dirt or dust within the air cleaner case. If any dirt or dust is found, clean it.
• Install the air cleaner element as shown in the figure.
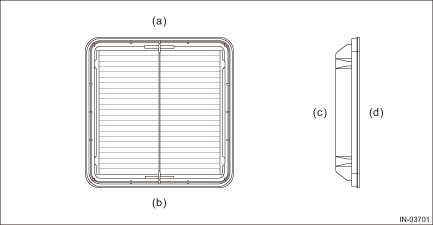
(a) | Upside | (b) | Downside | (c) | Air cleaner case (front) side |
(d) | Air cleaner case (rear) side |
• When installing the air cleaner case (rear), align the protrusion of the air cleaner case (rear) to the hole on the air cleaner case (front) to install.
3. Install the clips (B) to the air cleaner case (front), then tighten the clamp (A) that secures the air intake boot to the air cleaner case (rear).
Tightening torque:
Clamp (A)
3 N·m (0.3 kgf-m, 2.2 ft-lb)
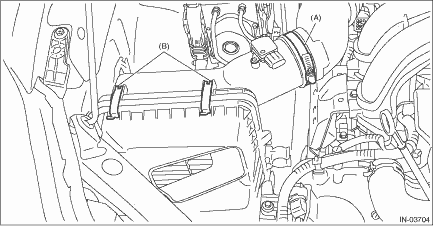
4. Connect the connector (A) to the mass air flow and intake air temperature sensor and secure the harness with clip (B).
5. Install the air intake duct. Air Intake Duct > INSTALLATION">
6. Connect the battery ground terminal. NOTE">
 Removal
INTAKE (INDUCTION)(H4DO) > Air Cleaner CaseREMOVAL1. Disconnect the ground cable from battery. NOTE">2. Remove the air intake duct. Air Intake Duct > REMOVAL">3. Disconnect the ...

Other materials:
Safety precautions
In the Subaru Ascent, infants and young children must always be seated in an
appropriate child restraint system positioned in the rear seats. This ensures maximum
protection and significantly reduces the risk of injury during sudden stops or collisions.
Always select a child restraint syste ...
Disassembly
SECURITY AND LOCKS > Ignition Key LockDISASSEMBLY1. Remove the immobilizer antenna assembly or the ignition switch illumination. Immobilizer Antenna > REMOVAL">2. Release the claws, and pull the key warning switch downwards to remove.3. Remove the screws and remove the key lock soleno ...
EyeSight (models with EyeSight
system)
NOTE
For models with the EyeSight system,
refer to the Owner's Manual supplement
for the EyeSight system.
BSD/RCTA (if equipped)
After entering the "BSD/RCTA" menu,
select the "Warning Volume" menu. You
can set the volume of the warning buzzer
for RCTA (Rear Cross Traffic Alert). You
can se ...
