Subaru Crosstrek Service Manual: Removal
LIGHTING SYSTEM > Auto Headlight Beam Leveler Control Module
REMOVAL
CAUTION:
Before handling the airbag system components, refer to “CAUTION” of “General Description” in “AIRBAG SYSTEM”. General Description > CAUTION">
1. Disconnect the ground cable from battery and wait for at least 60 seconds before starting work. NOTE">
2. Remove the cover assembly instrument panel LWR driver. Instrument Panel Lower Cover > REMOVAL">
3. Remove the knee airbag module. Knee Airbag Module > REMOVAL">
4. Release the lock and remove the fuse holder.
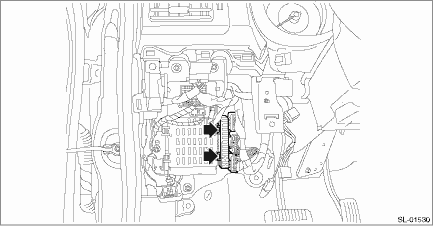
5. Remove the relay & fuse box.
(1) Disconnect the connector.
(2) Remove the bolts and nuts, and remove the relay & fuse box.
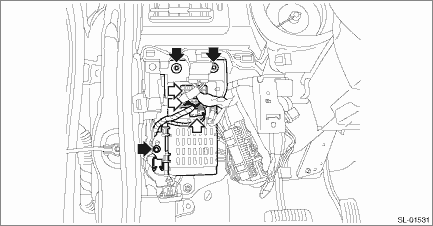
6. Disconnect the connector of body integrated unit.
NOTE:
On model with keyless access with push button start, disconnect the keyless access CM connector.
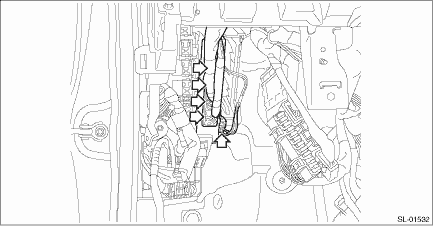
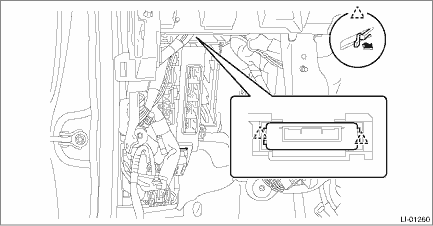
7. Remove the auto headlight beam leveler CM.
(1) Disconnect the connector.
(2) Release the claws and pull out the auto headlight beam leveler CM.
 Installation
LIGHTING SYSTEM > Auto Headlight Beam Leveler Control ModuleINSTALLATIONCAUTION:Before handling the airbag system components, refer to “CAUTION” of “General Description” in ...

Other materials:
Dtc p0455 evap system (cpc) leak detected (large leak)
ENGINE (DIAGNOSTICS)(H4DO) > Diagnostic Procedure with Diagnostic Trouble Code (DTC)DTC P0455 EVAP SYSTEM (CPC) LEAK DETECTED (LARGE LEAK)DTC detecting condition:Detected when two consecutive driving cycles with fault occur.Trouble symptom:• Fuel odor• There is a hole of more than 1.0 ...
Certification
Bluetooth
The Bluetooth word mark and logo are
registered trademarks of Bluetooth SIG,
Inc. and any use of such marks by Clarion
Co., Ltd. is under license.
SiriusXM Satel l i t e Radio ( i f
equipped)
SiriusXMTM and all related marks and
logos are trademarks of SiriusXM Radio
Inc. All ri ...
Inspection
SECURITY AND LOCKS > Rear Lock ButtonINSPECTION1. Using the Subaru Select Monitor, display «Rear gate/Trunk UNLOCK output» from «Data monitor».2. Check if the display changes when the rear lock button is operated.3. If the display is not correct as the result of inspection, refer to “Ge ...
