Subaru Crosstrek Service Manual: Removal
HVAC SYSTEM (HEATER, VENTILATOR AND A/C) > Heater and Cooling Unit
REMOVAL
CAUTION:
Before handling the airbag system components, refer to “CAUTION” of “General Description” in “AIRBAG SYSTEM”. General Description > CAUTION">
1. Disconnect the ground cable from battery and wait for at least 60 seconds before starting work. NOTE">
2. Using the refrigerant recovery system, discharge refrigerant. Refrigerant Recovery Procedure > PROCEDURE">
3. Drain the coolant from the radiator. Engine Coolant > REPLACEMENT">
4. Remove the air intake boot. Air Intake Boot > REMOVAL">
CAUTION:
Move aside the air intake boot to perform the operation without disconnecting the PCV hose.
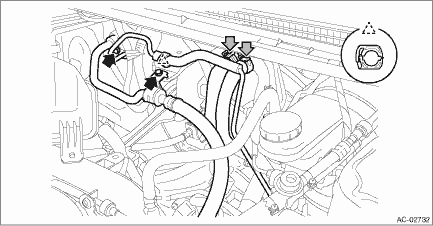
5. Remove the clips and bolts, and remove the hose - pressure suction and the pipe - evaporator cooling from the expansion valve - cooling.
CAUTION:
Seal the disconnected hose, pipe and engaging part of expansion valve with a plug or vinyl tape to prevent foreign matter from entering.
6. Loosen the heater hose clamps and detach the hoses.
NOTE:
Put alignment marks to hoses, clamps, etc.
7. Remove the instrument panel assembly. Instrument Panel Assembly > REMOVAL">
8. Remove the engine control module (ECM). Engine Control Module (ECM) > REMOVAL">
9. Remove the blower motor unit assembly. Blower Motor Unit Assembly > REMOVAL">
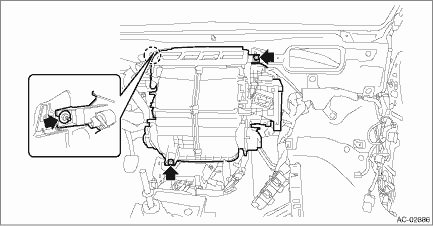
10. Remove the heater and cooling unit assembly.
(1) Disconnect each connector and the hose - drain.
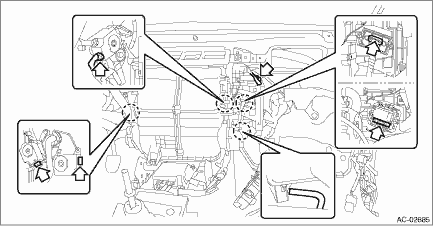
(2) Remove the bolt and nuts, and remove the heater & cooling unit assembly.
 Installation
HVAC SYSTEM (HEATER, VENTILATOR AND A/C) > Heater and Cooling UnitINSTALLATIONCAUTION:• Replace O-rings with new parts and install securely.• Before handling the airbag system component ...
 Heater core
...
Other materials:
Note
LIGHTING SYSTEM > Turn Signal Light and Hazard Light SystemNOTEFor operation procedures of each component of the turn signal and hazard light system, refer to the respective sections.• Combination switch (light): Combination Switch (Light)">• Front turn signal light bulb: Fr ...
Dtc p2420 evap system switching valve control circuit high
ENGINE (DIAGNOSTICS)(H4DO) > Diagnostic Procedure with Diagnostic Trouble Code (DTC)DTC P2420 EVAP SYSTEM SWITCHING VALVE CONTROL CIRCUIT HIGHDTC detecting condition:Immediately at fault recognitionCAUTION:After servicing or replacing faulty parts, perform Clear Memory Mode Clear Memory Mode > ...
Voice command system operation
1. Press the talk switch on the steering
wheel.
After the voice command top screen has
been displayed, speech guidance will
commence.
NOTE
When the voice command mode is
audio mode, voice guidance for the
voice command system can be skipped
by pressing the talk switch on the
steering ...
