Subaru Crosstrek Service Manual: Removal
CONTINUOUSLY VARIABLE TRANSMISSION(TR580) > Control Valve Body
REMOVAL
CAUTION:
• Directly after the vehicle has been running or the engine has been idling for a long time, the CVTF is hot. Be careful not to burn yourself.
• Be careful not to spill CVTF on the exhaust pipe to prevent it from emitting smoke or causing a fire. If the CVTF adheres, wipe it off completely.
• Always clean the engine compartment before removal.
NOTE:
The control valve body is replaced as an assembly only, because it is a non-disassembly part.
1. Disconnect the ground cable from battery. NOTE">
NOTE:
For model with battery sensor, disconnect the ground terminal from battery sensor.
2. Remove the clip (A) from the air intake boot.
3. Loosen the clamp (B) connecting the air intake boot and air cleaner case (rear).
4. Loosen the clamp (C) which connects the air intake boot and throttle body.
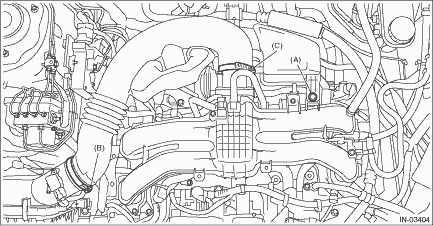
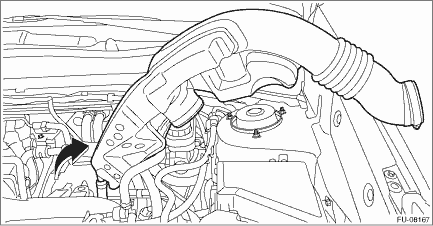
5. Remove the air intake boot from the throttle body, and move it to the left side wheel apron.
6. Disconnect the following connectors.
• Transmission harness connectors
• Inhibitor harness connector
• Transmission radio ground terminal
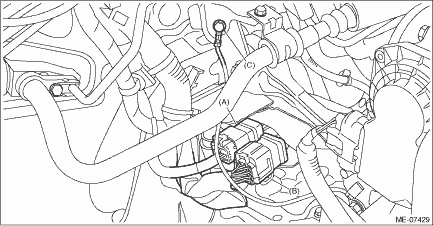
(A) | Transmission harness connectors |
(B) | Inhibitor harness connector |
(C) | Transmission radio ground terminal |
7. Remove the pitching stopper.
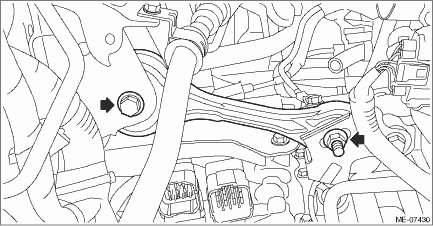
8. Remove the air breather hose from the pitching stopper bracket, and then remove the pitching stopper bracket and transmission radio ground cord.
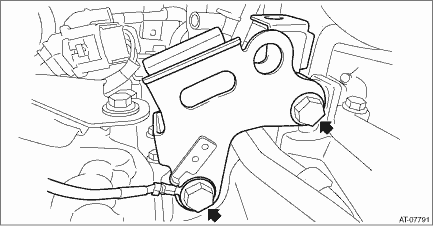
9. Remove the transmission case cover.
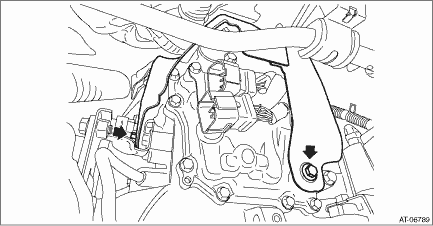
10. Remove the transmission harness stay and ground terminal.
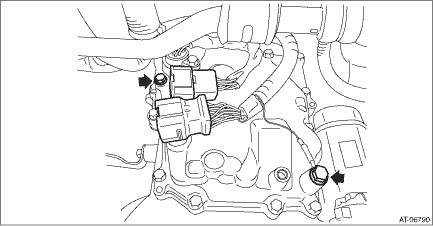
11. Remove the transmission harness connector from the harness stay.
12. Remove the throttle body, and move it aside so that it will not interfere with the removal of the control valve. Throttle Body > REMOVAL">
NOTE:
Do not remove the preheater hose.
13. Clean the transmission exterior.
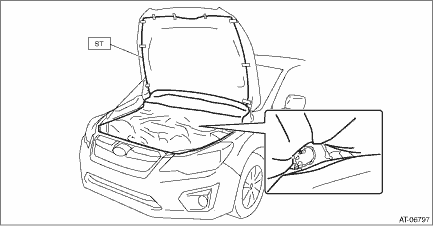
14. Fix the ST with tape, and set the ST to the vehicle.
NOTE:
When replacing the control valve body, the sheet is included in the control valve body for repairs.
| ST 18761AA010 | SHEET SPECIAL TOOL |
15. Remove the valve cover and gasket.
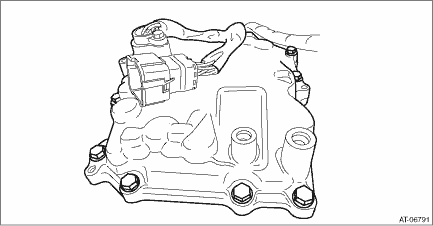
16. Remove the transmission harness from the valve cover.
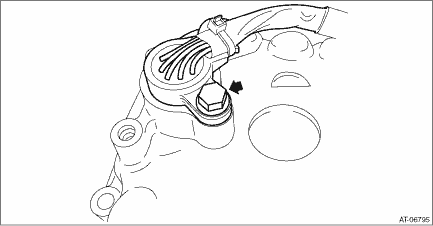
17. Remove the O-ring from the transmission harness.
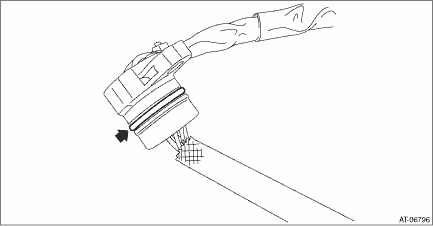
18. Disconnect the harness connector from the control valve body.
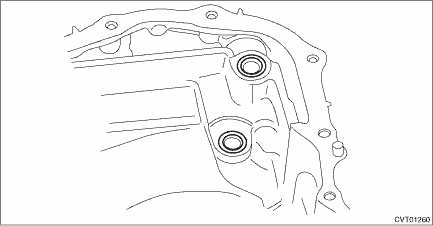
19. Remove the control valve body.
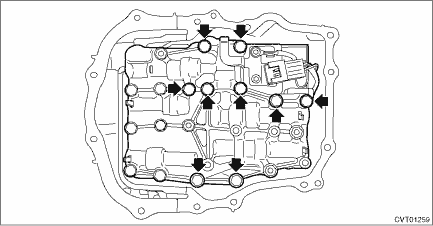
20. Remove the O-ring from the transmission.
 Inspection
CONTINUOUSLY VARIABLE TRANSMISSION(TR580) > Control Valve BodyINSPECTION• Check each part for damage or dust.• Measure the resistance of each solenoid, sensor and ground wire.NOTE:Measu ...
 Installation
CONTINUOUSLY VARIABLE TRANSMISSION(TR580) > Control Valve BodyINSTALLATION1. Clean the mating surface of valve cover and transmission side.CAUTION:When cleaning the mating surface of the transmissi ...
Other materials:
Dtc p0340 camshaft position sensor "a" circuit bank 1 or single sensor
ENGINE (DIAGNOSTICS)(H4DO) > Diagnostic Procedure with Diagnostic Trouble Code (DTC)DTC P0340 CAMSHAFT POSITION SENSOR "A" CIRCUIT BANK 1 OR SINGLE SENSORDTC DETECTING CONDITION:Immediately at fault recognitionTROUBLE SYMPTOM:• Engine stall• Failure of engine to startCAUTION ...
Removal
EMISSION CONTROL (AUX. EMISSION CONTROL DEVICES)(H4DO) > Leak Check Valve AssemblyREMOVAL1. Disconnect the ground cable from battery.2. Lift up the vehicle.3. Remove the rear exhaust pipe. Rear Exhaust Pipe > REMOVAL">4. Remove the propeller shaft. Propeller Shaft > REMOVAL"& ...
Removal
REAR SUSPENSION > Rear Lateral LinkREMOVAL1. Disconnect the ground cable from battery. NOTE">2. Lift up the vehicle, and then remove the rear wheels.3. Remove the sensor assembly - headlight beam leveler. (Model with auto headlight beam leveler, left side only)CAUTION:Do not apply impact ...
