Subaru Crosstrek Service Manual: Installation
EXTERIOR BODY PANELS > Door Sash Tape
INSTALLATION
CAUTION:
• Do not reuse the removed door sash tape. Replace it with a new tape.
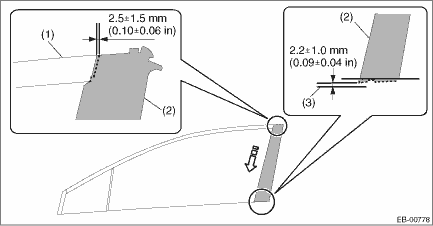
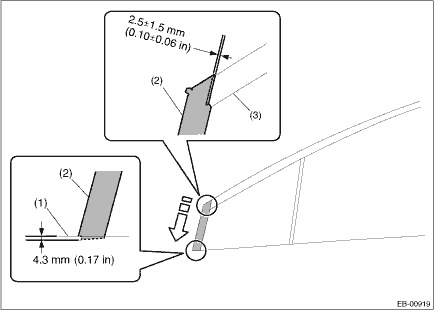
• Press evenly along the sash when applying the tape using a spatula or similar object to make sure no bubbles are formed.
If air bubbles are formed, reapply the tape.
• If the tape is wrinkled, etc. during application, replace the tape.
• Be sure to press the ends of the tape firmly to adhere securely. If the tape comes off at the ends or where folded, the adhesive strength is weakened and the tape may peel off.
• There are locations where the tape ends will overlap each other. When applying the tape, be careful of the following order of their application.
• Front
• Rear
1. FRONT DOOR
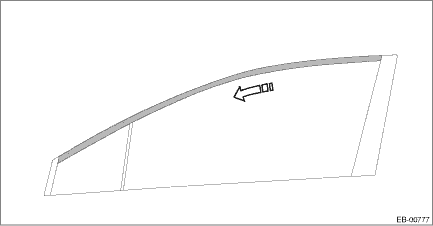
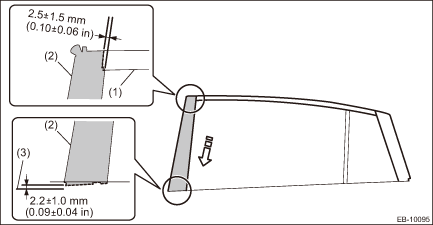
1. Apply the front door sash tape - medium from the rear of the vehicle towards the front.
2. Apply the front door sash tape - rear from the top of the vehicle towards the bottom.
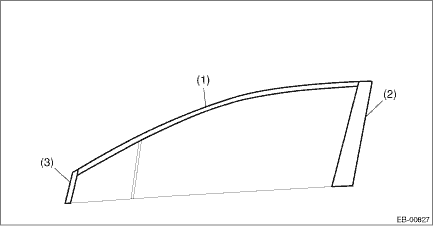
(1) | Front door sash tape - medium | (2) | Front door sash tape - rear | (3) | End of panel outer |
3. Fold the corners at the door upper end area in the order of (1) — (3).
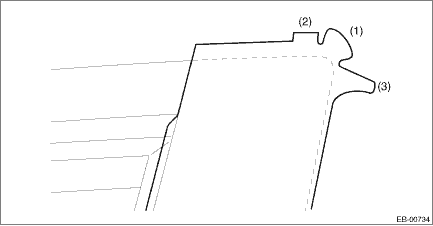
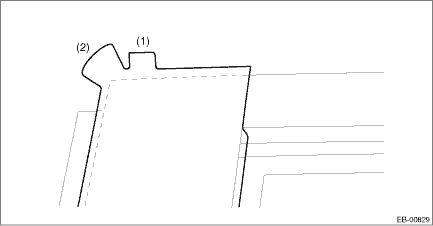
4. Apply the front door sash tape - front from the top of the vehicle towards the bottom.
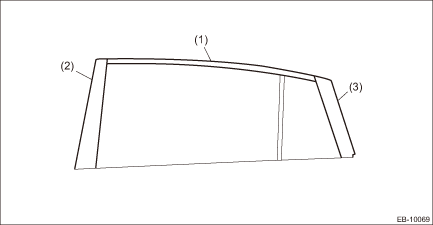
(1) | Upper end of weather strip | (2) | Front door sash tape - front | (3) | Front door sash tape - medium |
5. Fold the corners at the door upper end area in the order of (1) — (3).
6. Thereafter, install door parts in the reverse order of removal.
NOTE:
Before installation, check the following items.
• Rod of the latch and actuator assembly - front is free from deformation.
• Grease is applied sufficiently to the rod joints of the latch and actuator assembly - front.
• Cable of the latch and actuator assembly - front is free from deformation such as fray.
• Grease is applied sufficiently to the cable joints of the latch and actuator assembly - front.
2. REAR DOOR
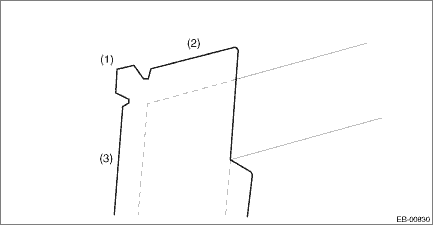
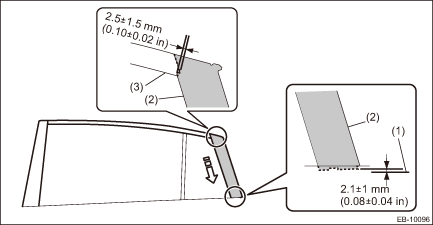
1. Apply the rear door sash tape - medium from the front of the vehicle towards the rear.
2. Apply the rear door sash tape - front from the top of the vehicle towards the bottom.
(1) | Rear door sash tape - medium | (2) | Rear door sash tape - front | (3) | End of panel outer |
3. Fold the corners at the door upper end area in the order of (1) — (2).
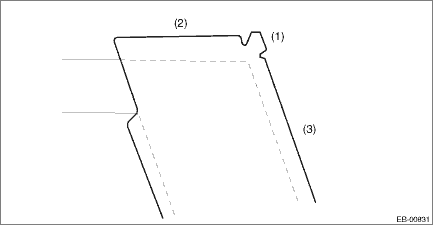
4. Apply the rear door sash tape - rear from the top of the vehicle towards the bottom.
(1) | End of panel outer | (2) | Rear door sash tape - rear | (3) | Rear door sash tape - medium |
5. Fold the corners at the door upper end area in the order of (1) — (3).
6. Thereafter, install door parts in the reverse order of removal.
NOTE:
Before installation, check the following items.
• Is the lever of the frame assembly - rear door outer is free from deformation?
• Is grease applied sufficiently to the lever joints of the latch and actuator assembly - rear?
• Is the cable of the latch and actuator assembly - rear free from deformation such as fray?
• Is grease applied sufficiently to the cable joints of the latch and actuator assembly - rear?
 Door sash tape
...
 Removal
EXTERIOR BODY PANELS > Door Sash TapeREMOVAL1. FRONT DOOR1. Disconnect the ground cable from battery and wait for at least 60 seconds before starting work. NOTE">2. Remove the trim panel - ...
Other materials:
Inspection
DRIVE SHAFT SYSTEM > Propeller ShaftINSPECTIONCheck the propeller shaft with the propeller shaft installed to the vehicle.1. Remove the front exhaust pipe. Front Exhaust Pipe > REMOVAL">2. Remove the center exhaust pipe, rear exhaust pipe, and muffler.• Center exhaust pipe & ...
Catalytic converter
The catalytic converter in the Subaru Ascent is a critical component of the exhaust
system, designed to reduce harmful emissions such as hydrocarbons (HC), carbon monoxide
(CO), and nitrogen oxides (NOx), thereby helping to protect the environment.
To maintain proper function and avoid cost ...
Multi information display (models with type B combination meter)
WARNING
Always pay adequate attention to
safe driving when operating the
multi information display while the
vehicle is in motion. When operation
of the multi information display
interferes with your ability to concentrate
on driving, stop the vehicle
before performing operations on the
scr ...
