Subaru Crosstrek Service Manual: Inspection
REAR SUSPENSION > Rear Shock Absorber
INSPECTION
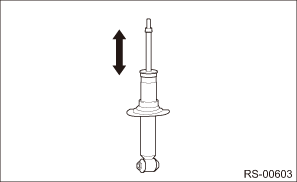
1. Check for oil leaks.
2. Move the piston rod up and down to check that it operates smoothly without any hitch.
3. Check the piston rod for play as follows:
(1) Fix the outer shell in place and fully extend the rod.
(2) Set the dial gauge on the end of the rod L [10 mm (0.39 in)].
(3) While applying a force of W [20 N (2 kgf, 4 lbf)] to the threaded part, read the dial gauge indication P1.
(4) Apply a force of 20 N (2 kgf, 4 lbf) from the opposite direction of “W”, and then read the dial gauge indication P2.
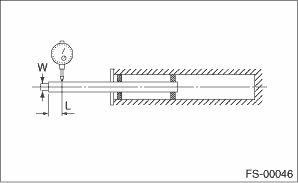
Play limit (P1 + P2): 0.8 mm (0.031 in)
 Disposal
REAR SUSPENSION > Rear Shock AbsorberDISPOSALCAUTION:• Before discarding the strut COMPL and the shock absorber COMPL, be sure to wear goggles to protect eyes from gas, oil and cutting powder ...
 Installation
REAR SUSPENSION > Rear Shock AbsorberINSTALLATIONCAUTION:• Use a new flange nut.• Always tighten the bushing in the state where the vehicle is at curb weight and the wheels are in full ...
Other materials:
Inspection
AIRBAG SYSTEM (DIAGNOSTICS) > Subaru Select MonitorINSPECTION1. COMMUNICATION FOR INITIALIZING IMPOSSIBLEDTC detecting condition:Defective harness connectorTrouble symptom:Communication is impossible between the airbag control module and the Subaru Select Monitor.CAUTION:Before performing diagnos ...
Installation
CONTROL SYSTEMS > AT Shift Lock Solenoid and “P” Range SwitchINSTALLATIONInstall in the reverse order of removal.NOTE:Insert the solenoid unit terminals to the harness connector.(A)Solenoid unit (color code: blue)(B)Solenoid unit (color code: black) ...
Dtc p0711 transmission fluid temperature sensor "a" circuit range/performance
CONTINUOUSLY VARIABLE TRANSMISSION (DIAGNOSTICS) > Diagnostic Procedure with Diagnostic Trouble Code (DTC)DTC P0711 TRANSMISSION FLUID TEMPERATURE SENSOR "A" CIRCUIT RANGE/PERFORMANCEDTC DETECTING CONDITION:Detected when two consecutive driving cycles with fault occur.TROUBLE SYMPTOM:&b ...
