Subaru Crosstrek Owners Manual: Hill start assist system
WARNING
- The Hill start assist system is a device only for helping the driver to START the vehicle on an uphill grade. To prevent accidents when the vehicle is parked on a slope, be sure to firmly set the parking brake. When setting the parking brake, make sure that the vehicle remains stationary when the clutch pedal (MT models) and brake pedal (both MT and CVT models) are released.
- Do not turn the ignition switch to the "LOCK"/"OFF" position while the Hill start assist system is operating. The Hill start assist system will be deactivated and may lead to an accident.
The Hill start assist system is a device to make the following vehicle operations easier.
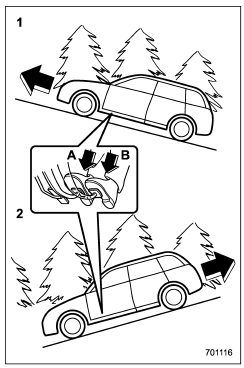
- Starting forward facing uphill
- Starting backward facing downhill
- Brake pedal (both MT models and CVT models)
- Clutch pedal (MT models only)
In both these cases, the Hill start assist system operates under the following conditions.
- when the clutch pedal is depressed while the brake pedal is also depressed (MT models)
- when the vehicle has stopped with the brake pedal depressed (CVT models)
Braking power is maintained temporarily (for approximately 2 seconds) by the Hill start assist system after the brake pedal is released. The driver is therefore able to start the vehicle in the same way as on a level grade, just using the clutch pedal (MT models only) and accelerator pedal (all models).
If the braking power of the Hill start assist system is insufficient after the brake pedal is released, apply more braking power by depressing the brake pedal again.
The Hill start assist system may not operate on slight grades. Also, the Hill start assist system does not operate in the following cases.
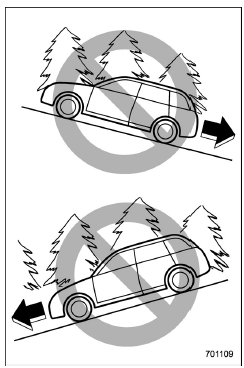
- when starting backward facing uphill
- when starting forward facing downhill
- while the parking brake is applied
- while the ignition switch is in the "ACC" or "LOCK"/"OFF" position
- while the Hill start assist warning light/ Hill start assist OFF indicator light is illuminated
When using the Hill start assist system, a braking effect may be felt even after the brake pedal has been released. However, for MT models, this braking effect should disappear once the clutch pedal is released.
CAUTION
The braking power of the Hill start assist system may not be sufficient when strong braking power is needed (e.g., while towing a trailer).
NOTE
A slight jolt may be felt when the vehicle begins to move forward after being reversed.
To activate/deactivate the Hill start assist system
CAUTION
While the Hill start assist system is deactivated, when starting on an uphill grade, braking power is not maintained if the brake pedal is released. Start on an uphill grade by using the parking brake.
You can activate/deactivate the Hill start assist system according to the following procedure.
NOTE
If you make an error when performing any steps in the following procedure, place the ignition switch in the "LOCK"/"OFF" position once and then start over again.
To deactivate
1. Park your vehicle in a flat and safe location and apply the parking brake.
2. Turn the ignition switch to the "LOCK"/ "OFF" position.
3. Restart the engine.

Type B
4. Confirm the following items.
(1) The brake system warning light illuminates.
(2) The Vehicle Dynamics Control warning light turns off.
(3) The Vehicle Dynamics Control OFF indicator light turns off.
(4) The ABS warning light turns off.
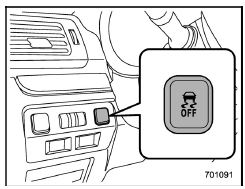
Vehicle Dynamics Control OFF switch
5. Press the Vehicle Dynamics Control
OFF switch and hold it until the Vehicle
Dynamics Control OFF indicator light "
 "
on the combination meter illuminates for
30 seconds and then turns off.
6. Within 5 seconds after the Vehicle Dynamics Control OFF indicator light turns off, release the Vehicle Dynamics Control OFF switch.
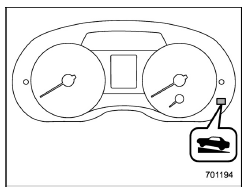
Hill start assist OFF indicator light (type A)
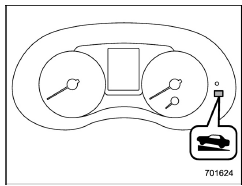
Hill start assist OFF indicator light (type B)
7. Within 2 seconds after releasing the Vehicle Dynamics Control OFF switch, press the Vehicle Dynamics Control OFF switch once again. Then the Hill start assist OFF indicator light blinks.
8. Turn the ignition switch to the "LOCK"/ "OFF" position. The hill start assist system has now been deactivated.
NOTE
While the Hill start assist system is deactivated, the Hill start assist OFF indicator light blinks.
To activate
When the procedure to deactivate the Hill start assist system is performed again, the system is activated. When the Hill start assist system is activated, the Hill start assist OFF indicator light turns off.
Hill start assist warning light/Hill start assist OFF indicator light
Refer to "Hill start assist warning light/Hill start assist OFF indicator light" F3-22.
 Parking tips
When parking your vehicle, always perform
the following items.
Apply the parking brake firmly
For MT models, put the shift lever in the
"1" (1st) for upgrade or "R" (Reverse) for a
downgrad ...
 Cruise control (if equipped)
NOTE
For models with EyeSight system:
Refer to the Owner's Manual supplement
for the EyeSight system.
Cruise control enables you to maintain a
constant vehicle speed without holding
your foot on ...
Other materials:
Disassembly
MECHANICAL(H4DO) > Cylinder BlockDISASSEMBLY1. CYLINDER BLOCK1. Remove the oil separator cover from cylinder block RH.2. Remove the liquid gasket from cylinder block RH.3. Remove the cylinder block plug (A) and the main gallery plug (B) from cylinder block RH.4. Remove the liquid gasket from the ...
Fuel gauge
Fuel gauge (type A)
Trip knob
Fuel gauge (type B)
Trip knob (U.S.-spec. models)
Trip knob (except U.S.-spec. models)
The fuel gauge is displayed when the
ignition is in the "ON" position, and it
shows the approximate amount of fuel
remaining in the tank.
The gauge indic ...
Inspection
SECURITY AND LOCKS > Rear Lock ButtonINSPECTION1. Using the Subaru Select Monitor, display «Rear gate/Trunk UNLOCK output» from «Data monitor».2. Check if the display changes when the rear lock button is operated.3. If the display is not correct as the result of inspection, refer to “Ge ...
