Subaru Crosstrek Service Manual: Adjustment
CONTROL SYSTEMS > Select Cable
ADJUSTMENT
1. Shift the select lever to “N” range.
2. Lift up the vehicle.
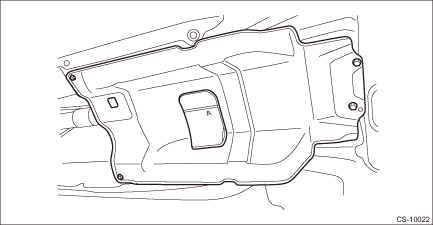
3. Remove the center exhaust pipe. Center Exhaust Pipe > REMOVAL">
4. Remove the center exhaust cover.
5. Loosen the adjusting nuts on both sides.
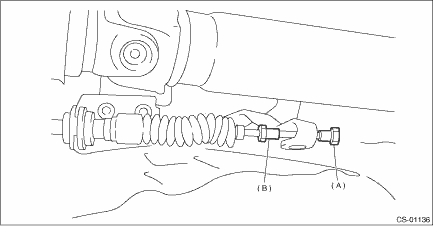
(A) | Adjusting nut A |
(B) | Adjusting nut B |
6. Turn adjusting nut B until it lightly touches the connector.
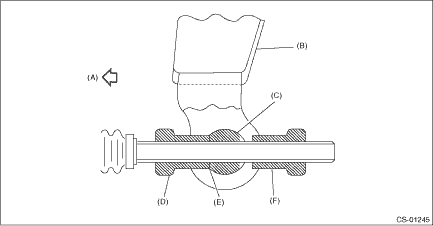
(A) | Forward side |
(B) | Select lever |
(C) | Connector |
(D) | Adjusting nut B |
(E) | Contact point |
(F) | Adjusting nut A |
7. Set a spanner wrench to adjusting nut B so that it does not rotate, and then tighten the adjusting nut A.
Tightening torque:
7.5 N·m (0.8 kgf-m, 5.5 ft-lb)
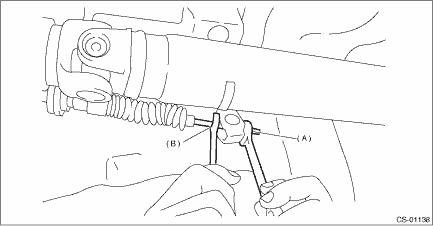
(A) | Adjusting nut A |
(B) | Adjusting nut B |
8. After the completion of adjustment, confirm that the select lever operates normally at all ranges.
9. Install in the reverse order of removal.
 Select cable
...
 Removal
CONTROL SYSTEMS > Select CableREMOVAL1. Shift the select lever to “N” range.2. Disconnect the ground cable from battery. NOTE">NOTE:For model with battery sensor, disconnect th ...
Other materials:
Check list for interview Check
EyeSight (DIAGNOSTICS) > Check List for InterviewCHECKInspect the following items regarding the vehicle’s state.Writer/InspectorWriter’s name Inspector’s Name Vehicle informationCar accessory equipment conditionCar accessory is installed to the windshield glass.No/Yes(Position: ...
Caution
CONTROL SYSTEMS > General DescriptionCAUTION• Wear appropriate work clothing, including a cap, protective goggles and protective shoes when performing any work.• Remove contamination including dirt and corrosion before removal, installation or disassembly.• Keep the disassembled ...
Removal
SUNROOF/T-TOP/CONVERTIBLE TOP (SUNROOF) > Glass LidREMOVAL1. GLASS LID1. Completely close the lid assembly - sunroof, and open the sunshade assembly.2. Remove the TORX® bolt, and then remove the lid assembly - sunroof.CAUTION:Be careful not to damage the lid assembly - sunroof.PREPARATION TOOL:T ...
