Subaru Crosstrek Service Manual: Removal
MECHANICAL(H4DO) > Rocker Cover
REMOVAL
1. ROCKER COVER RH
NOTE:
When replacing a single part, perform the work with the engine assembly installed to body.
1. When working on the vehicle
NOTE:
When working on the vehicle, perform the following steps also.
(1) Remove the air cleaner case. Air Cleaner Case > REMOVAL">
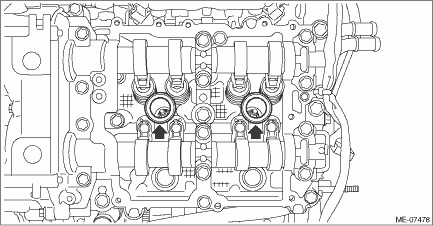
(2) Remove the clip (A) from the air intake boot, and loosen the clamp (B) securing the air intake boot to the throttle body.
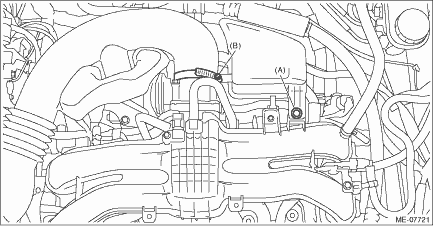
(3) Remove the air intake boot from the throttle body, and move it to the left side wheel apron.
(4) Remove the front exhaust pipe. Front Exhaust Pipe > REMOVAL">
2. Remove the #1 ignition coil and the #3 ignition coil. Ignition Coil > REMOVAL">
3. Remove the intake manifold protector RH.
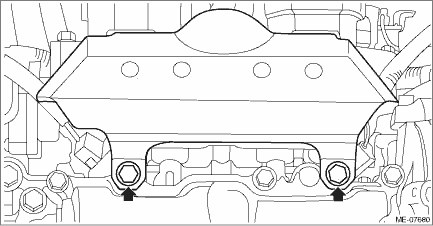
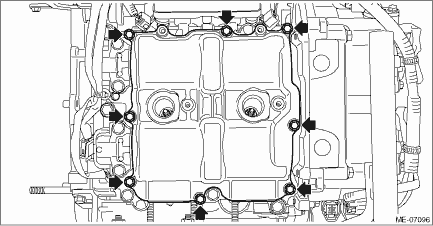
4. Remove the rocker cover RH.
5. Remove the rocker cover gasket RH, #1 spark plug pipe gasket and #3 spark plug pipe gasket, and remove the liquid gasket.
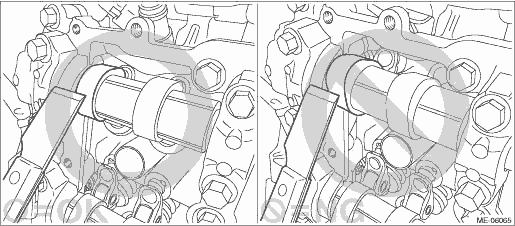
CAUTION:
• When removing the liquid gasket from engine unit using scraper, use special care not to damage the cam lobe of camshaft RH.
• If the cam lobe of camshaft RH interferes, turn the crankshaft to the position where the scraper does not touch.
2. ROCKER COVER LH
NOTE:
When replacing a single part, perform the work with the engine assembly installed to body.
1. When working on the vehicle
NOTE:
When working on the vehicle, perform the following steps also.
(1) Remove the V-belt covers.

(2) Remove the V-belts. V-belt > REMOVAL">
(3) Remove the battery. Battery > REMOVAL">
(4) Remove the air intake duct. Air Intake Duct > REMOVAL">
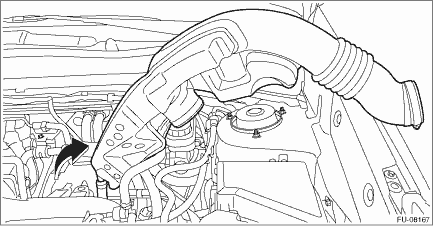
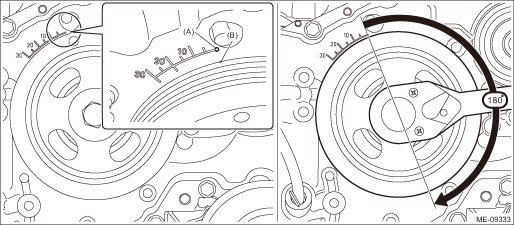
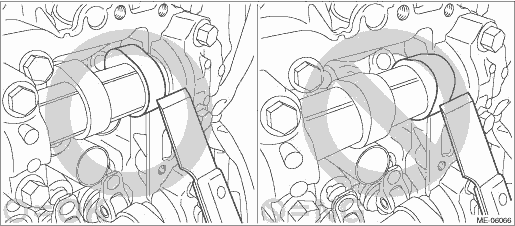
(5) Align the timing mark (B) on crank pulley to the 0° in timing gauge (A) on chain cover as shown in the figure, and turn the crankshaft by 180° clockwise from that position.
NOTE:
This procedure is required to prevent the rocker cover LH and the cam lobe of camshaft LH contacting with each other when removing the rocker cover LH.
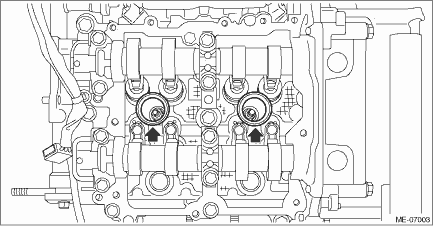
2. Remove the #2 ignition coil and the #4 ignition coil. Ignition Coil > REMOVAL">
3. Remove the intake manifold protector LH.

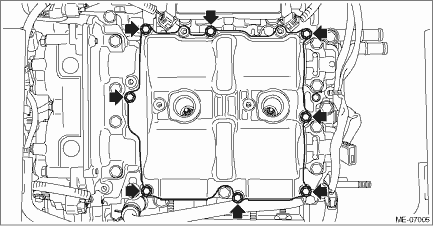
4. Remove the rocker cover LH.
5. Remove the rocker cover gasket LH, #2 spark plug pipe gasket and #4 spark plug pipe gasket, and remove the liquid gasket.
CAUTION:
• When removing the liquid gasket from engine unit using scraper, use special care not to damage the cam lobe of camshaft LH.
• If the cam lobe of camshaft LH interferes, turn the crankshaft to the position where the scraper does not touch.
 Inspection
MECHANICAL(H4DO) > Rocker CoverINSPECTIONCheck that the rocker cover does not have deformation, cracks and any other damage. ...
 Installation
MECHANICAL(H4DO) > Rocker CoverINSTALLATION1. ROCKER COVER RH1. Install the #1 spark plug pipe gasket and #3 spark plug pipe gasket to the #1 spark plug pipe and #3 spark plug pipe.NOTE:• Use ...
Other materials:
Air cleaner element
WARNING
Do not operate the engine with the
air cleaner element removed. The air
cleaner element not only filters
intake air but also stops flames if
the engine backfires. If the air
cleaner element is not installed
when the engine backfires, you
could be burned.
CAUTION
When replacing the ...
Engine oil pressure Inspection
MECHANICAL(H4DO) > Engine Oil PressureINSPECTION1. Disconnect the ground cable from battery. NOTE">2. Remove the oil pressure switch. Oil Pressure Switch > REMOVAL">3. Install the oil pressure gauge to the chain cover.4. Connect the battery ground terminal. NOTE">5. ...
Removal
SECURITY AND LOCKS > Starter Cut RelayREMOVALCAUTION:Before handling the airbag system components, refer to “CAUTION” of “General Description” in “AIRBAG SYSTEM”. General Description > CAUTION">1. Disconnect the ground cable from battery and wait fo ...
