Subaru Crosstrek Service Manual: Inspection
DRIVE SHAFT SYSTEM > Propeller Shaft
INSPECTION
Check the propeller shaft with the propeller shaft installed to the vehicle.
1. Remove the front exhaust pipe. Front Exhaust Pipe > REMOVAL">
2. Remove the center exhaust pipe, rear exhaust pipe, and muffler.
• Center exhaust pipe & rear exhaust pipe: Rear Exhaust Pipe > REMOVAL">
• Muffler: Muffler > REMOVAL">
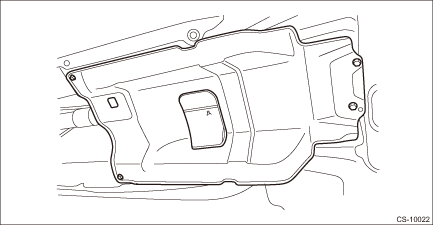
3. Remove the bolts, and then remove the center exhaust cover.
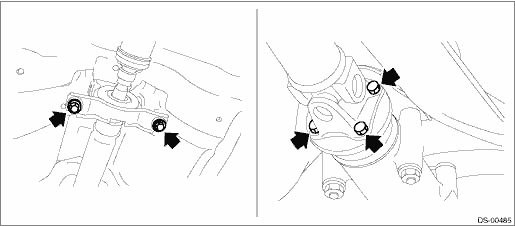
4. Check the propeller shaft mounting bolt for looseness.
(1) Yoke flange mounting bolts which connect to the rear differential
(2) Center bearing bracket mounting bolts
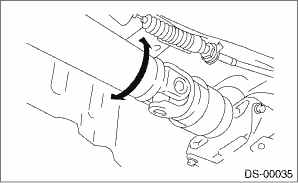
5. Check the spline and bearing for the propeller shaft.
(1) Turn the propeller shaft by hand to check if abnormal free play exists at splines.
(2) Also move yokes to check if abnormal free play exists at spiders and bearings.
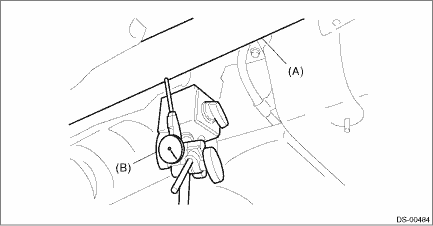
6. Measure the deflection of the propeller shaft.
(1) Set the dial gauge (B) with its indicator stem at the center of the propeller shaft (A).
(2) Turn the propeller shaft (A) slowly by hands to check for runout of the propeller shaft.
Runout:
Limit: 0.6 mm (0.024 in)
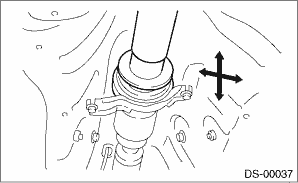
7. Check the center bearing for free play.
Move the propeller shaft near the center bearing up, down, left, right by hand, to check for any abnormal free play of the bearings.
8. Replace the propeller shaft assembly if faulty is found in the inspection.
 Propeller shaft
...
 Removal
DRIVE SHAFT SYSTEM > Propeller ShaftREMOVALCAUTION:• Before removing propeller shaft, wrap metal parts with a cloth or rubber material.• Do not disassemble the center EDJ of the propell ...
Other materials:
Disassembly
REAR SUSPENSION > Rear Shock AbsorberDISASSEMBLY1. Using a coil spring compressor, compress the coil spring.2. Using a hexagon wrench to prevent the shock absorber piston rod from turning, remove the self-locking nut with ST.CAUTION:When installing the coil spring compressor to the coil spring, f ...
Installation
LUBRICATION(H4DO) > Engine Oil FilterINSTALLATION1. OIL FILTERCAUTION:Do not tighten excessively, or oil may leak.1. Clean the oil filter installation surface.2. Obtain a new oil filter and apply a thin coat of engine oil to the seal rubber.3. Install the oil filter by turning it by hand, being c ...
Daylight saving time setting
1. Perform the preparation steps according
to "Preparation for date setting" 3-
56.
2. Operate the "
" or "
"
switch to
select the "Daylight Saving Time" item.
Then push the
button.
3. The current setting will be displayed.
Push the
button to enter the selection ...
