Subaru Crosstrek Service Manual: Installation
SEAT BELT SYSTEM > Front Seat Belt
INSTALLATION
1. SEAT BELT OUTER - FRONT
CAUTION:
• The parts of the driver and passenger sides are not the same. Before installation, make sure that the correct part is used.
• During installation, make sure that the seat belts are not twisted.
• After installation, make sure that the seat belt can be pulled out and retracted smoothly.
• Make sure that the seat belt harness is not caught anywhere. Wrong harness rooting may cause the harness short from pinch.
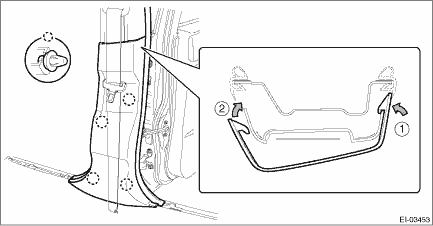
• Do not reuse the upper clips of the trim panel - center pillar UPR. Once the clip is removed, its holding force is reduced. Be sure to replace it with a new clip.
1. Before installation, perform a unit inspection of retractor. Front Seat Belt > INSPECTION">
2. Install the adjuster assembly - seat belt and the seat belt outer - front.
Tightening torque:
Front seat belt: General Description > COMPONENT">
3. Install the remaining parts in the reverse order of removal.
Tightening torque
Trim panel - center pillar UPR: 7.5 N·m (0.76 kgf-m, 5.5 ft-lb)
NOTE:
Assemble the trim panel - center pillar LWR to the trim panel - center pillar UPR securely.
4. After installation, check the following points.
• The seat belt is not twisted.
• The seat belt can be pulled out and retracted smoothly.
• The adjuster assembly - seat belt can be moved smoothly.
• Check that the airbag warning light lights up for approximately 6 seconds and then turns off when connecting the battery ground cable and turning the ignition switch to ON.
2. SEAT BELT INNER - FRONT
CAUTION:
• Before installation, make sure that the correct part is used.
• During installation, make sure that the seat belts are not twisted.
• Check that there is no pinching of the seat belt harness. Wrong harness rooting may cause the harness short from pinch.
• Do not forget the wave washer, when installing front seat inner belt assembly.
1. Install the seat belt inner - front.
Tightening torque:
Front seat belt: General Description > COMPONENT">
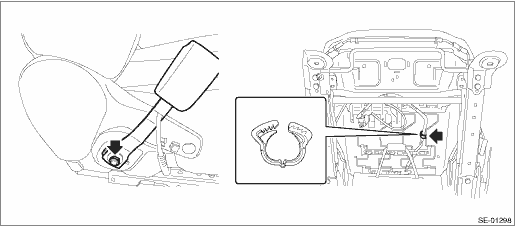
2. Locate the seat belt harness and retain it with a harness clip.
3. Install the seat assembly to the body. Front Seat > INSTALLATION">
4. Check that no harness is caught by sliding the seat back and forth.
5. Connect the battery ground terminal. NOTE">
3. ADJUSTABLE ANCHOR ASSY
Referring to the installation procedure for seat belt outer - front, install the parts in the reverse order of removal.
Tightening torque:
Front seat belt: General Description > COMPONENT">
Trim panel - center pillar UPR: 7.5 N·m (0.76 kgf-m, 5.5 ft-lb)
 Removal
SEAT BELT SYSTEM > Front Seat BeltREMOVAL1. SEAT BELT OUTER - FRONTCAUTION:• Before handling the airbag system components, refer to “CAUTION” of “General Description” ...

Other materials:
Preparation tool
OCCUPANT DETECTION SYSTEM (DIAGNOSTICS) > General DescriptionPREPARATION TOOLCAUTION:To measure the voltage and resistance of airbag system and occupant detection system components, be sure to use the specified test harness.1. SPECIAL TOOLILLUSTRATIONTOOL NUMBERDESCRIPTIONREMARKS — SUBARU SELEC ...
Tips for operating the audio/visual system
CAUTION
To avoid damage to the audio/visual
system:
Be careful not to spill beverages
over the audio/visual system.
Do not put anything other than an
appropriate disc into the disc
slot.
NOTE
The use of a cell phone inside or near
the vehicle may cause a noise from the
speakers o ...
Dtc u0416 invalid data received from vehicle dynamics control module
POWER ASSISTED SYSTEM (POWER STEERING) (DIAGNOSTICS) > Diagnostic Procedure with Diagnostic Trouble Code (DTC)DTC U0416 INVALID DATA RECEIVED FROM VEHICLE DYNAMICS CONTROL MODULENOTE:Refer to “LAN SYSTEM” for diagnostic procedure. Basic Diagnostic Procedure"> ...
