Subaru Crosstrek Owners Manual: To decrease the speed (by the "RES/SET" switch)
Press the "RES/SET" switch to the "SET" side and hold it until the vehicle reaches the desired speed. Then, release the switch. The vehicle speed at that moment will be memorized and treated as the new set speed.
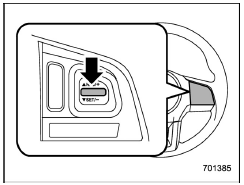
U.S.-spec. models
When the difference between the actual vehicle speed and the set speed is small, the set speed can be lowered 1 mph (1.6 km/h) each time by pressing the "RES/ SET" switch to the "SET" side quickly.
Except U.S.-spec. models
When the difference between the actual vehicle speed and the set speed is small, the set speed can be lowered 1 km/h each time by pressing the "RES/SET" switch to the "SET" side quickly.
NOTE
If the "RES/SET" switch is repeatedly operated quickly to the "SET" side, the set vehicle speed displayed in the combination meter becomes the low speed setting. However, when the set vehicle speed is set to a speed much lower than the actual vehicle speed, the set speed may be reset to the actual vehicle speed.
 To increase the speed (by accelerator pedal)
1. Depress the accelerator pedal to
accelerate the vehicle to the desired
speed.
2. Press the "RES/SET" switch to the
"SET" side once. Now the desired speed
is set and the vehicle will keep r ...
 To decrease the speed (by brake pedal)
1. Depress the brake pedal to release
cruise control temporarily.
2. When the speed decreases to the
desired speed, press the "RES/SET"
switch to the "SET" side once. Now the
desired speed is ...
Other materials:
Installation
FUEL INJECTION (FUEL SYSTEMS)(H4DO) > Engine Control Module (ECM)INSTALLATIONInstall in the reverse order of removal.CAUTION:• When the ECM of model with immobilizer has been replaced, be sure to perform the registration of immobilizer system.• For model without keyless access with pu ...
Catalytic converter
The catalytic converter is installed in the
exhaust system. It serves as a catalyst to
reduce HC, CO and NOx in exhaust
gases, thus providing cleaner exhaust.
To avoid damage to the catalytic converter:
Use only unleaded fuel. Even a small
amount of leaded fuel will damage the
cata ...
Diagnostic procedure with phenomenon
EyeSight (DIAGNOSTICS) > Diagnostics with PhenomenonDIAGNOSTIC PROCEDURE WITH PHENOMENON1. TEMPORARY STOP OF EyeSightPhenomenonCheck ItemReference1Temporary stop occurs frequently.EyeSight temporary stop indicator illuminates frequently.(1) Check EyeSight temporary stop code. EyeSight Temporary C ...
