Subaru Crosstrek Service Manual: Removal
EMISSION CONTROL (AUX. EMISSION CONTROL DEVICES)(H4DO) > EGR Cooler
REMOVAL
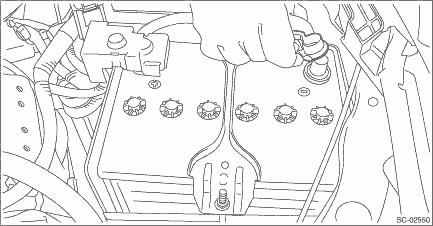
1. Disconnect the ground cable from battery.
2. Drain engine coolant. Engine Coolant > REPLACEMENT">
3. Remove the center exhaust pipe. Center Exhaust Pipe > REMOVAL">
4. Lower the vehicle.
5. Remove the clip (A), and loosen the clamps (B) and (C) securing the air intake boot.
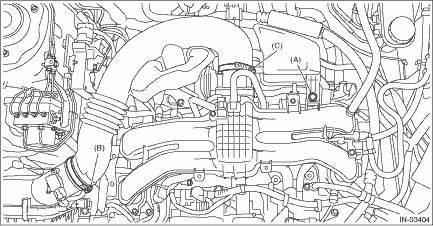
6. Remove the air intake boot from the air cleaner case (rear) and throttle body, and move the air intake boot aside so that it does not interfere with the work.
7. Remove the clip holding the air breather hose to the engine rear hanger. (MT model)
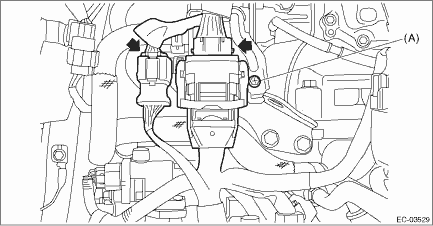
8. Disconnect the engine harness connector.
(1) Remove the bolt (A) securing the bulkhead harness connector bracket.
(2) Disconnect the bulkhead harness connector from the engine harness connector (black) and engine harness connector (brown).
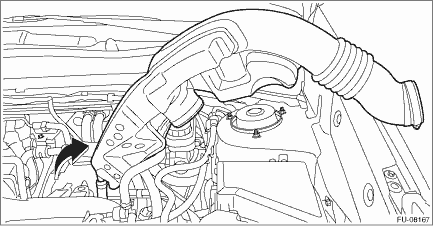
9. Remove the engine rear hanger.
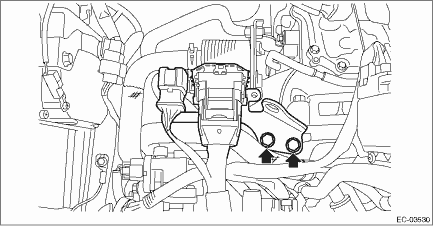
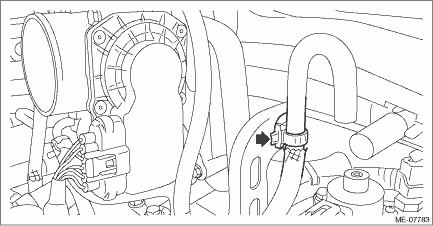
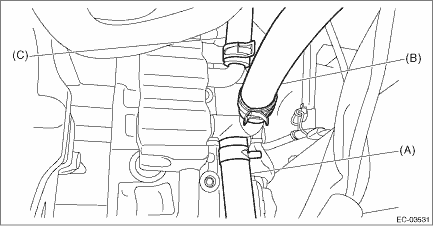
10. Disconnect the engine coolant hose (A), engine coolant hose (B) (CVT model) and engine coolant hose (C) from the EGR cooler.
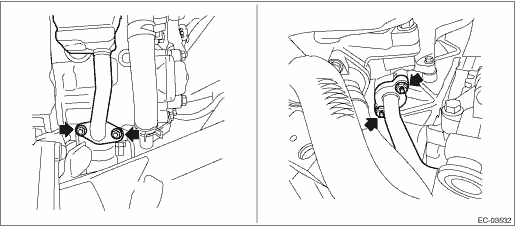
11. Remove the nuts which secure the EGR cooler to the cylinder head RH.
12. Remove the nuts which secure the EGR cooler to the EGR control valve.
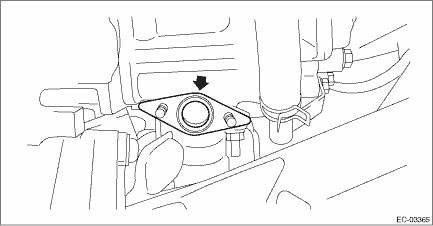
13. Remove the gasket from the stud bolt.
 Inspection
EMISSION CONTROL (AUX. EMISSION CONTROL DEVICES)(H4DO) > EGR CoolerINSPECTION1. Check that the EGR cooler has no deformation, cracks or other damages.2. Check that the hose has no cracks, damage or ...
 Installation
EMISSION CONTROL (AUX. EMISSION CONTROL DEVICES)(H4DO) > EGR CoolerINSTALLATION1. Set the gasket to the stud bolt.NOTE:Use a new gasket.2. Temporarily tighten the bolts securing the EGR cooler to t ...
Other materials:
Dtc p0970 pressure control solenoid "c" control circuit low
CONTINUOUSLY VARIABLE TRANSMISSION (DIAGNOSTICS) > Diagnostic Procedure with Diagnostic Trouble Code (DTC)DTC P0970 PRESSURE CONTROL SOLENOID "C" CONTROL CIRCUIT LOWDTC detecting condition:Immediately at fault recognitionTrouble symptom:Drivability getting worse.CAUTION:Use the check bo ...
Component
EXTERIOR BODY PANELS > General DescriptionCOMPONENT1. FRONT HOOD(1)Hood COMPL - front(6)Stopper - front hoodTightening torque: N·m (kgf-m, ft-lb)(2)Hinge COMPL - front hood(7)Stay - hood supportT1:25 (2.55, 18.4)(3)Cover - front fender(8)Seal - front ductT2:33 (3.36, 24.3)(4)Insulator - fr ...
Command list
Recognizable voice commands and their
actions are shown below.
NOTE
Some voice commands may not be
available depending on the market,
vehicle specifications or the device
connection status.
Frequently used commands are
listed in the following tables.
For devices that are not instal ...
