Subaru Crosstrek Service Manual: Installation
DIFFERENTIALS > Rear Differential (T-type)
INSTALLATION
1. Attach the rear differential member plate to the rear differential.
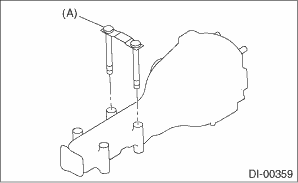
(A) | Rear differential member plate |
2. Set the rear differential to transmission jack.
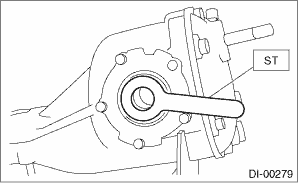
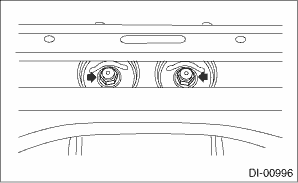
3. Set the ST to the rear differential.
| ST 28099PA090 | OIL SEAL PROTECTOR |
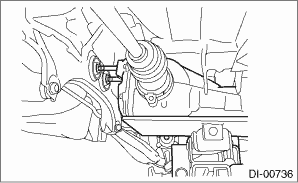
4. Insert the rear drive shaft until the spline portion of the rear drive shaft exceeds the side oil seal.

5. Remove ST from rear differential.
6. Push the rear differential from side to side to insert the DOJ into rear differential completely.

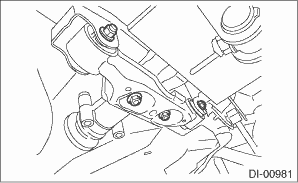
7. Adjust the transmission jack, if necessary, and insert the rear differential stud bolt into the rear differential mount bushing properly.
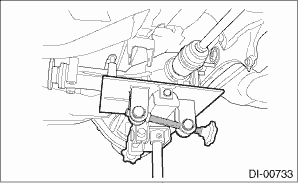
8. After inserting the rear differential stud bolt into the rear differential mount bushing, lift up the transmission jack and align the rear differential to its attachment position.
9. Tighten a new self-locking nut temporarily to the rear differential stud bolt.
10. Install the rear differential front member, and temporarily attach and tighten a new self-locking nut.
11. Remove the transmission jack.
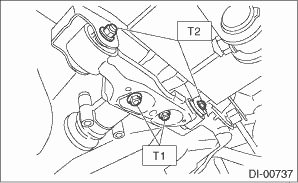
12. Tighten the self-locking nut.
Tightening torque:
T1: 50 N·m (5.1 kgf-m, 36.9 ft-lb)
T2: 110 N·m (11.2 kgf-m, 81.1 ft-lb)
13. Tighten the self-locking nut.
Tightening torque:
70 N·m (7.1 kgf-m, 51.6 ft-lb)
14. Install the propeller shaft. Propeller Shaft > INSTALLATION">
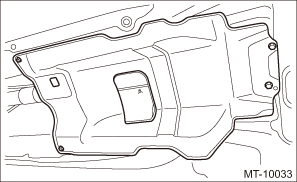
15. Install the center exhaust cover.
Tightening torque:
18 N·m (1.8 kgf-m, 13.3 ft-lb)
16. Install the rear exhaust pipe. Rear Exhaust Pipe > INSTALLATION">
17. Fill differential gear oil. Differential Gear Oil > REPLACEMENT">
18. Installing procedure hereafter is in the reverse order of removal.
19. Perform “Rear differential inspection mode” using the Subaru Select Monitor. (CVT model) Rear Differential Inspection Mode">
CAUTION:
Be sure to perform rear differential inspection mode when the following work has been performed.
• Replacement of rear differential
• Replacement of rear differential hypoid gear set
• Replacement of transmission assembly
• Replacement of front differential hypoid gear set
 Inspection
DIFFERENTIALS > Rear Differential (T-type)INSPECTIONWash all the disassembled parts clean, and examine them for wear, damage and other defects. Repair or replace the defective parts as necessary.1. ...
 Removal
DIFFERENTIALS > Rear Differential (T-type)REMOVAL1. Shift the select lever or gear shift lever to neutral.2. Release the parking brake.3. Disconnect the ground cable from battery.4. Lift up the veh ...
Other materials:
Check list for interview Check
OCCUPANT DETECTION SYSTEM (DIAGNOSTICS) > Check List for InterviewCHECK1. CONDITIONS OF MALFUNCTIONCustomer’s Name Inspector’s Name Date Vehicle Brought in/ /Registration No. Odometer readingkmmilesV.I.N. Date Problem Occurred/ /Registration Year/ /Occ ...
Caution
AIRBAG SYSTEM > General DescriptionCAUTION1. BEFORE STARTING ALL WORKS• Before performing vehicle maintenance, turn the ignition switch to OFF and disconnect the negative terminal from battery. NOTE">• The airbag system (including pretensioner) is fitted with a backup power s ...
Note
GLASS/WINDOWS/MIRRORS > Remote Control Mirror SystemNOTEFor procedure of each component in the remote control mirror system, refer to the respective section.• Outer mirror assembly: Outer Mirror Assembly">• Remote control mirror switch: Remote Control Mirror Switch"> ...
