Subaru Crosstrek Service Manual: Inspection
SEATS > Front Seat
INSPECTION
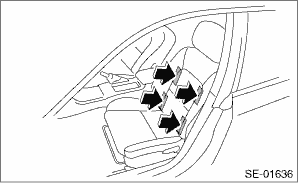
1. SEAT COVER
Check that there is no tear or fray on the cover COMPL - front backrest and the cover - front cushion.
NOTE:
For model with side airbag, if the door side of the cover COMPL - front backrest is torn or frayed, the side airbag may not be deployed properly. In this case, replace the cover COMPL - front backrest with a new part.
2. CHECK ILLUMINATION OF PASSENGER’S SEAT BELT WARNING LIGHT
Check that the passenger’s seat belt warning light illuminates when the passenger’s seat is occupied.

If it does not illuminate, check the seat belt warning system and the occupant detection system.
• Seat belt warning system: Seat Belt Warning System">
• Occupant detection system: Basic Diagnostic Procedure">
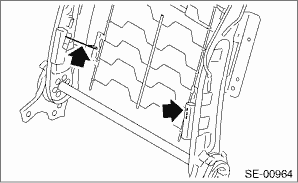
3. FLAT MAT HOOK
Check the flat mat hook by applying weight to the backrest assembly.
NOTE:
If the appropriate stiffness is not obtained by applying weight to the backrest assembly, the hook may be disengaged.
If it is due to the deformation of the hook, replace the hook with a new part.
 Disassembly
SEATS > Front SeatDISASSEMBLY1. DRIVER’S SEATCAUTION:Before assembling, make sure how the harnesses such as the side airbag harness and the seat belt inner - front harness are routed in order ...
 Installation
SEATS > Front SeatINSTALLATIONInstall each part in the reverse order of removal.CAUTION:• The front seat mounting bolts differ between the front mounting points and the rear mounting points. ...
Other materials:
Dtc b1837 short in curtain airbag lh squib circuit (to ground)
AIRBAG SYSTEM (DIAGNOSTICS) > Diagnostic Chart with Trouble CodeDTC B1837 SHORT IN CURTAIN AIRBAG LH SQUIB CIRCUIT (TO GROUND)Diagnosis start condition:Ignition voltage is 10 V to 16 V.DTC detecting condition:• Curtain airbag harness (LH) circuit is shorted to ground.• Curtain airbag ...
Removal
LIGHTING SYSTEM > Rear Height SensorREMOVALCAUTION:Always remove the sensor assembly - headlight beam leveler before removing any parts related to the suspension.1. Disconnect the ground cable from battery. NOTE">2. Lift up the vehicle, and remove the left rear wheel.3. Remove the sensor ...
Removal
GLASS/WINDOWS/MIRRORS > Rear Regulator and Motor AssemblyREMOVAL1. Disconnect the ground cable from battery. NOTE">2. Remove the trim panel - rear door. Door Trim > REMOVAL">3. Remove the sealing cover - rear door. Rear Sealing Cover > REMOVAL">4. Remove the glass ...
