
Subaru Crosstrek Service Manual: Disassembly
BRAKE > Rear Disc Brake Assembly
DISASSEMBLY
CAUTION:
Be careful not to allow foreign matter to enter the brake hose connector.
1. Remove mud and foreign matter from the caliper body assembly.
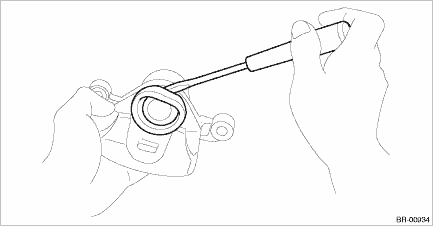
2. Remove the piston boot from caliper body cylinder.
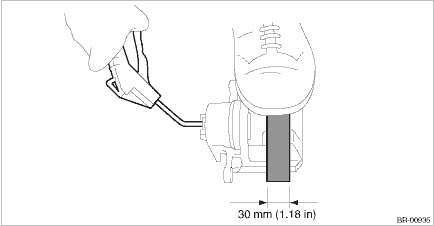
3. Remove the piston - disc brake.
(1) Place a wooden block in the caliper body assembly as shown in the figure to prevent the piston - disc brake from jumping out and being damaged.
(2) Using an air gun, gradually apply compressed air via the brake hose installation hole to push out the piston - disc brake.
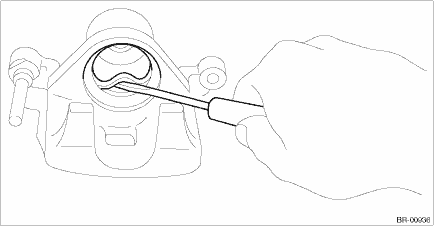
4. Remove the piston seal from caliper body cylinder.
CAUTION:
Do not damage the cylinder and piston seal groove.
5. Remove the guide pin - rear brake, lock pin - rear brake, lock pin - sleeve, and pin boot from the support - rear disc brake.
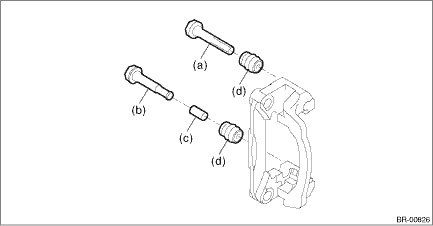
(a) | Guide pin - rear brake (black) | (c) | Lock pin - sleeve | (d) | Pin boot |
(b) | Lock pin - rear brake (silver) |
 Removal
BRAKE > Rear Disc Brake AssemblyREMOVALCAUTION:Do not allow brake fluid to come in contact with the painted surface of the vehicle body. If it does, wash off with water and wipe away completely.1. ...
 Inspection
BRAKE > Rear Disc Brake AssemblyINSPECTION1. Check the caliper body cylinder and piston - disc brake for uneven wear, damage or rust.2. Check the rubber parts for damage or deterioration.3. If faul ...
Other materials:
Unit settings
Sound quality adjustment, screen adjustment,
and information of the audio unit are
displayed.
1. Press the HOME button on the audio
panel.
2. Touch the "SETTINGS" key.
3. Select the items to be set.
Available setting:
General settings: Select the
tab to
check the system ...
Clock
To adjust the time shown by the clock,
press the "+" button or "−" button. If you
press the "+" button, the indicated time will
change in one-minute increments. If you
press the "−" button, the indicated time will
change in one-minute decrements. If you
keep the button pressed, ...
Bluetooth audio
The Bluetooth audio system enables
users to enjoy listening to music that is
played on a portable player on the vehicle
speakers via wireless communication.
This audio system supports Bluetooth, a
wireless data system capable of playing
portable audio music without cables. If
your device do ...
