Subaru Crosstrek Service Manual: Assembly
CONTROL SYSTEMS > MT Gear Shift Lever
ASSEMBLY
NOTE:
• Clean all the parts before assembly.
• Apply NIGTIGHT LYW No. 2 grease or equivalent to each part. General Description > COMPONENT">
1. Mount the bushing and cushion rubber to the stay.
(A) | Bushing |
(B) | Stay |
(C) | Cushion rubber |
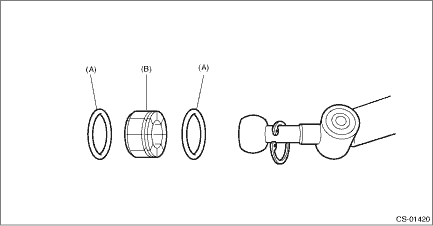
2. Install the bushing and spacer to boss.
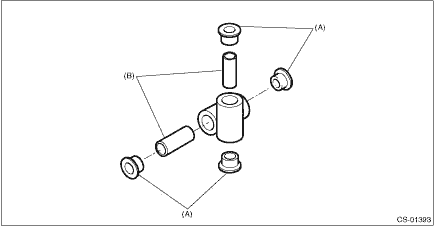
(A) | Bushing |
(B) | Spacer |
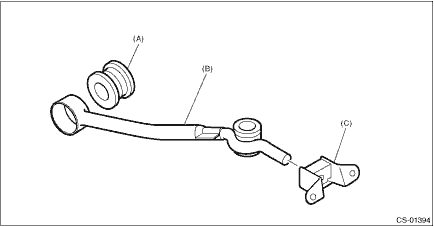
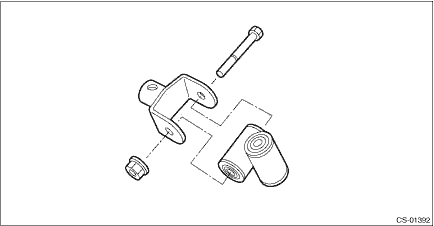
3. Install the boss to the joint.
NOTE:
Use a new self-locking nut.
Tightening torque:
12 N·m (1.2 kgf-m, 8.9 ft-lb)
4. Install the snap ring to gear shift lever and install the bushing.
NOTE:
Apply grease to the bushing.
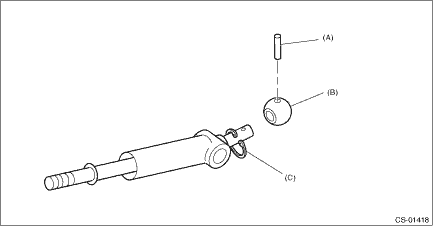
(A) | Spring pin |
(B) | Bushing |
(C) | Snap ring |
5. Apply grease to the bushing and O-ring, and then install to gear shift lever.
(A) | O-ring |
(B) | Bushing |
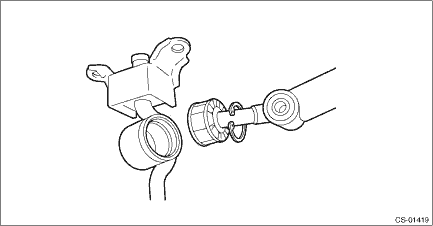
6. Apply sufficient grease into boss, and then install the gear shift lever to the stay.
7. Install the snap ring.
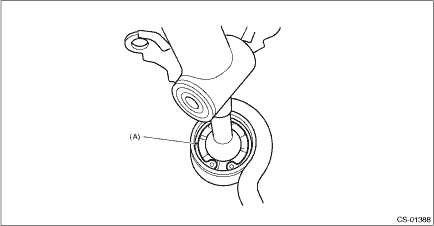
(A) | Snap ring |
8. Insert the gear shift lever and rod into boot hole.
9. Install the rod.
NOTE:
Use a new self-locking nut.
Tightening torque:
12 N·m (1.2 kgf-m, 8.9 ft-lb)
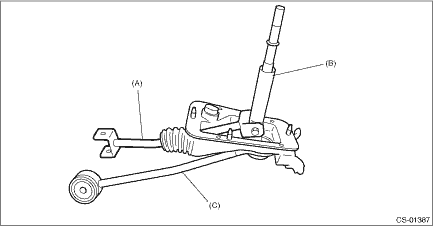
(A) | Rod |
(B) | Lever |
(C) | Stay |
10. Install the lock wire.
NOTE:
Use a new lock wire.

(A) | Lock wire |
NOTE:
• Install the lock wire to the stay groove.
• Bend the extra wire to the same direction of lock wire winding.
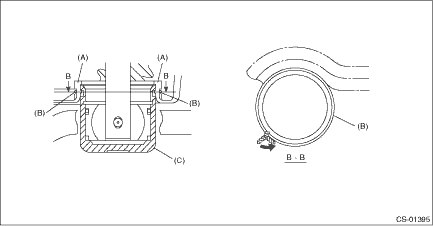
(A) | Inner boot |
(B) | Lock wire |
(C) | Stay |

 Removal
CONTROL SYSTEMS > MT Gear Shift LeverREMOVAL1. Disconnect the ground cable from battery. NOTE">NOTE:For model with battery sensor, disconnect the ground terminal from battery sensor.2. Rem ...
Other materials:
Dtc b2313 rear radar detect vdc
Blind Spot Detection/Rear Cross Traffic Alert (DIAGNOSTICS) > Diagnostic Procedure with Diagnostic Trouble Code (DTC)DTC B2313 REAR RADAR DETECT VDCDTC DETECTING CONDITION:Vehicle dynamics control (VDC) fails.TROUBLE SYMPTOM:• All functions of BSD/RCTA stop.• Fail icon is displayed in ...
Bluetooth settings
Touch the tab to set Bluetooth.
Item
Function
BT Devices
Connection
Select to pair/connect the Bluetooth
devices.
In-Car-Device
setting
Select to enter the Bluetooth
device name or PIN-code.
For details, refer to "Bluetoothsettings"
F5-65. ...
Maintenance precautions
When maintenance and service are required,
it is recommended that all work be
done by an authorized SUBARU dealer.
If you perform maintenance and service
by yourself, you should familiarize yourself
with the information provided in this
section on general maintenance and
service for your SU ...
