
Subaru Crosstrek Owners Manual: Ashtray (dealer option)
CAUTION
Observe the following precautions.
Not doing so could result in a fire.
- Always extinguish matches and cigarettes before putting them into the ashtray, and then close the ashtray securely.
- Do not put flammable material in the ashtray
- Do not leave a lighted cigarette in the ashtray.
- Do not leave a lot of cigarette butts in the ashtray.
NOTE
Particles of ash and tobacco will accumulate around the hinges of the ashtray's inner lid. Clean them off using a toothbrush or a similar narrow-ended implement.
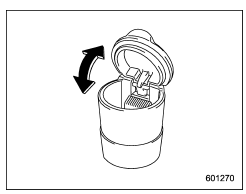
The portable ashtray can be installed in each cup holder or bottle holder. For the locations of the cup holders, refer to "Cup holders" F6-7. For the locations of the bottle holders, refer to "Bottle holders" F6- 7.
When using the ashtray, open the lid of the ashtray. Fully close the lid after using the ashtray to help reduce residual smoke.
 Accessory power outlets
Power outlet below the climate control dials
Power outlet in the center console
Accessory power outlets are provided
below the climate control dials and in the
center console. Electrical p ...
 Floor mat (if equipped)
CAUTION
If the floor mat slips forward and
interferes with the movement of the
pedals during driving, it could cause
an accident. Observe the following
precautions to prevent the floor mat
f ...
Other materials:
Dtc p2109 throttle/pedal position sensor "a" minimum stop performance
ENGINE (DIAGNOSTICS)(H4DO) > Diagnostic Procedure with Diagnostic Trouble Code (DTC)DTC P2109 THROTTLE/PEDAL POSITION SENSOR "A" MINIMUM STOP PERFORMANCENOTE:For the diagnostic procedure, refer to DTC P2101. Diagnostic Procedure with Diagnostic Trouble Code (DTC) > DTC P2101 THROTTL ...
Safety tips for installing child restraint systems
WARNING
Child restraint systems and seatbelts in the Subaru Ascent can become
extremely hot when the vehicle is exposed to sunlight.
Always check the temperature of the restraint system before placing a
child in it to prevent burns.
Never use a seatbelt extender when installing a ...
Removal
HVAC SYSTEM (HEATER, VENTILATOR AND A/C) > Sunload Sensor (Auto A/C Model)REMOVALCAUTION:Be careful not to damage the sensors and interior trims when removing.1. Disconnect the ground cable from battery. NOTE">2. Remove the sunload sensor.(1) Release the connectors and claws, and then re ...
