Subaru Crosstrek Service Manual: Removal
COOLING(H4DO) > Water Pipe Assembly
REMOVAL
1. WATER PIPE ASSEMBLY RH
1. Disconnect the ground cable from battery. NOTE">
2. Drain engine coolant. Engine Coolant > REPLACEMENT">
3. Remove the front exhaust pipe. Front Exhaust Pipe > REMOVAL">
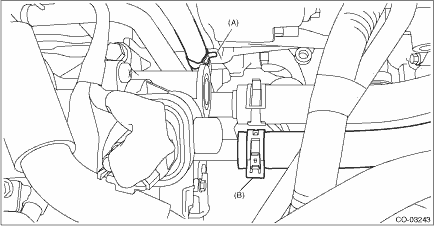
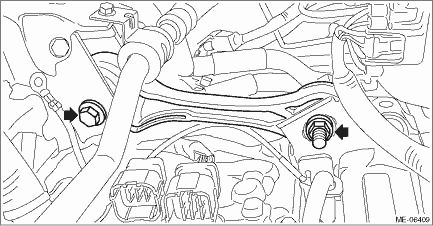
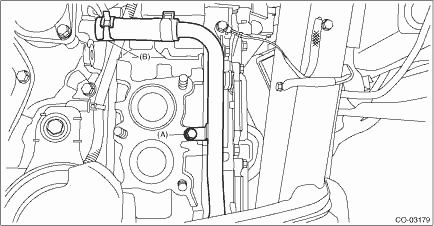
4. Disconnect the water hose (A) from the water pipe assembly RH, and remove the bolt (B) securing the water pipe assembly RH to the cam carrier RH.
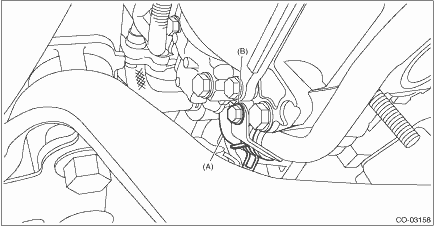
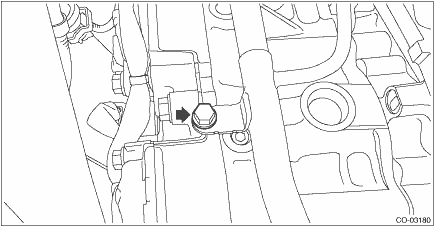
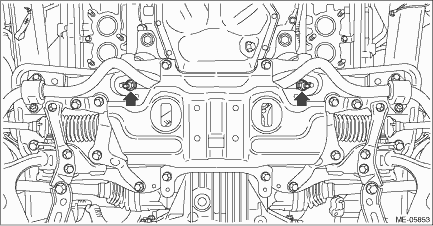
5. Remove the bolt (A) which secures the water pipe assembly RH to the cylinder head RH.
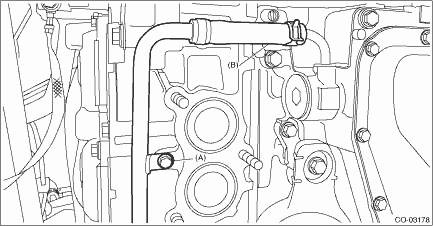
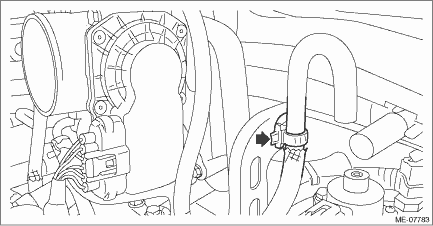
6. Disconnect the water pipe hose RH (B) from oil pan upper, and remove the water pipe assembly RH.
2. WATER PIPE ASSEMBLY LH
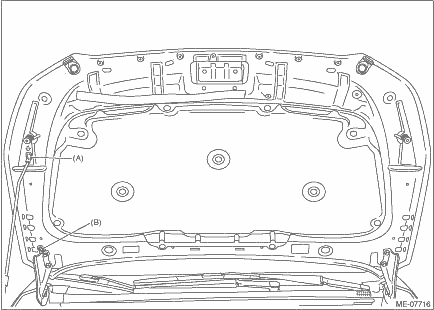
1. Open the front hood, and make alignment marks (A) on both the front hood and the front hood striker by using a marker pen.

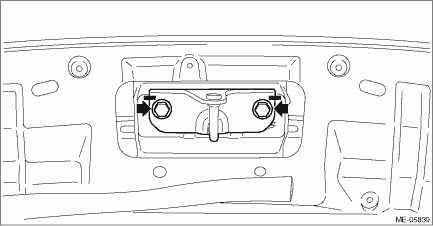
2. Remove the front hood striker from the front hood.
3. Change the front hood stay position from (A) to (B), and completely open the front hood.
4. Disconnect the ground cable from battery. NOTE">
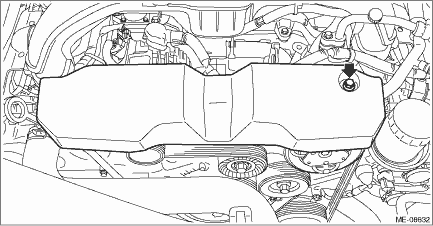
5. Remove the V-belt covers.
6. Remove the air intake duct. Air Intake Duct > REMOVAL">
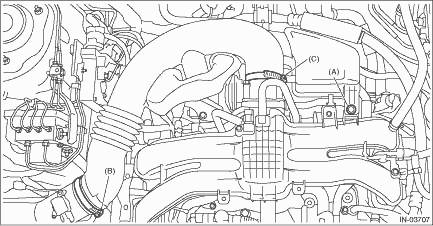
7. Remove the clip (A) from the air intake boot.
8. Loosen the clamp (B) securing the air cleaner case (rear) to the air intake boot.
9. Loosen the clamp (C) which secures the throttle body to the air intake boot.
10. Remove the air intake boot from the throttle body, and place the air intake boot aside so that it does not interfere with the work.
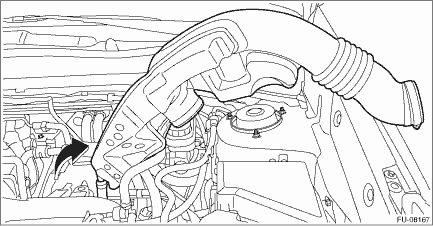
11. Disconnect the connector from the mass air flow and intake air temperature sensor, and remove the clip (A) which holds the mass air flow and intake air temperature sensor harness.
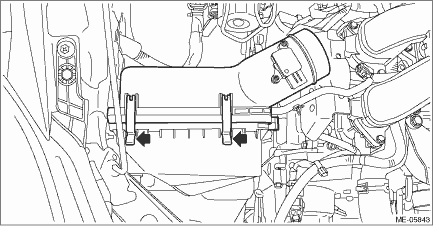
12. Remove the air cleaner case (rear).
13. Drain engine coolant. Engine Coolant > REPLACEMENT">
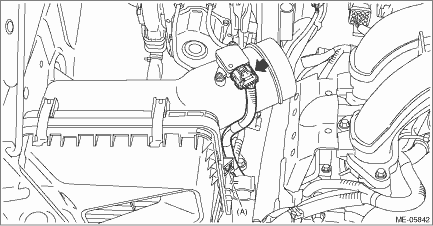
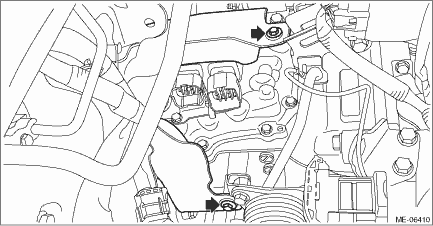
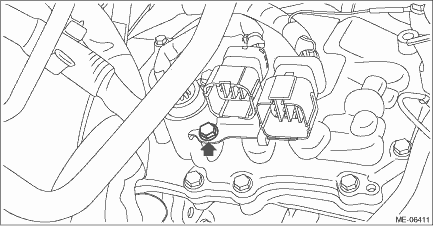
14. Disconnect the preheater hose (A) and the heater outlet hose (B) from the water pipe assembly LH.
15. Remove the bolt which holds the water pipe assembly LH from the cylinder head LH.
16. Remove the clip holding the air breather hose to the engine rear hanger. (MT model)
17. Lift up the vehicle.
18. Remove the front exhaust pipe. Front Exhaust Pipe > REMOVAL">
19. Remove the nuts which secure the engine mounting to the front crossmember. (CVT model)
20. Remove the nuts which secure the engine mounting to the front crossmember. (MT model)
21. Lower the vehicle.
22. Disconnect the bulkhead harness connector from the transmission harness connector (A) and the inhibitor harness connector (B), and disconnect the transmission radio ground terminal (C) from the vehicle body. (CVT model)

23. Remove the pitching stopper.
24. Remove the transmission case cover. (CVT model)
25. Remove the bolt which holds the transmission harness stay. (CVT model)
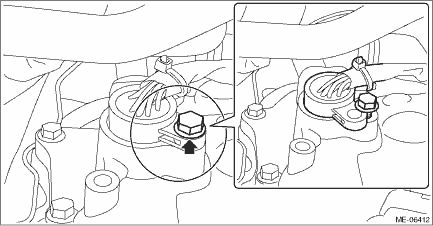
26. Remove the bolt which holds the transmission harness to the control valve body, and turn the transmission harness clockwise till the bolt hole can be seen as shown in the figure, and tighten the bolt to temporary lock the harness. (CVT model)
NOTE:
This procedure is required to prevent the transmission harness from touching the vehicle body during engine lift-up.
27. Lift up the engine with a lifting device and wire ropes.
CAUTION:
When lifting up the engine, pay attention to the clearance of each part and be careful not to lift the engine too much, in order to prevent damaging the vehicle.

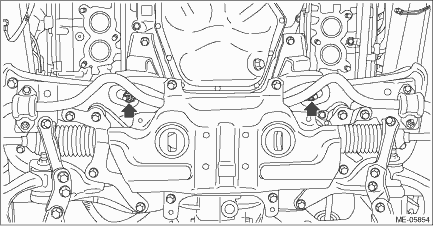
28. Remove the bolt (A) which secures the water pipe assembly LH to the cylinder head LH.
29. Disconnect the water pipe hose LH (B) from oil pan upper, and remove the water pipe assembly LH.
 Inspection
COOLING(H4DO) > Water Pipe AssemblyINSPECTION1. Check that the water pipe assembly has no deformation, cracks or other damages.2. Check that the hose has no cracks, damage or loose part. ...
 Installation
COOLING(H4DO) > Water Pipe AssemblyINSTALLATION1. WATER PIPE ASSEMBLY RH1. Set the water pipe assembly RH on the engine, and connect the water pipe hose RH (B) to the oil pan upper.2. Secure the wa ...
Other materials:
Removal
HVAC SYSTEM (HEATER, VENTILATOR AND A/C) > Power Transistor (Auto A/C Model)REMOVAL1. Disconnect the ground cable from battery. NOTE">2. Remove the glove box. Glove Box > REMOVAL">3. Remove the screws and remove the duct - foot RH.NOTE:Remove the connector and harness clip of ...
Dtc p0851 park/neutral switch input circuit low
ENGINE (DIAGNOSTICS)(H4DO) > Diagnostic Procedure with Diagnostic Trouble Code (DTC)DTC P0851 PARK/NEUTRAL SWITCH INPUT CIRCUIT LOW1. AT MODELDTC detecting condition:Detected when two consecutive driving cycles with fault occur.Trouble symptom:Improper idlingCAUTION:After servicing or replacing f ...
USB memory
Audio files on the USB memory can be
played.
WARNING
Do not operate the player's controls
or connect the USB memory while
driving. Doing so may result in
losing control of your vehicle and
cause an accident or serious injury.
CAUTION
Do not leave your USB memory
in the car. In particul ...
