Subaru Crosstrek Service Manual: Inspection
SEATS > Front Seat
INSPECTION
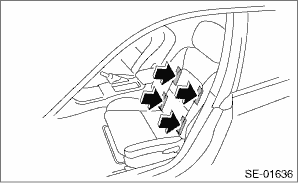
1. SEAT COVER
Check that there is no tear or fray on the cover COMPL - front backrest and the cover - front cushion.
NOTE:
For model with side airbag, if the door side of the cover COMPL - front backrest is torn or frayed, the side airbag may not be deployed properly. In this case, replace the cover COMPL - front backrest with a new part.
2. CHECK ILLUMINATION OF PASSENGER’S SEAT BELT WARNING LIGHT
Check that the passenger’s seat belt warning light illuminates when the passenger’s seat is occupied.
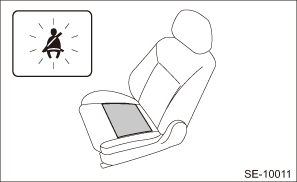
If it does not illuminate, check the seat belt warning system and the occupant detection system.
• Seat belt warning system: Seat Belt Warning System">
• Occupant detection system: Basic Diagnostic Procedure">
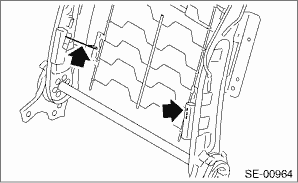
3. FLAT MAT HOOK
Check the flat mat hook by applying weight to the backrest assembly.
NOTE:
If the appropriate stiffness is not obtained by applying weight to the backrest assembly, the hook may be disengaged.
If it is due to the deformation of the hook, replace the hook with a new part.
 Disassembly
SEATS > Front SeatDISASSEMBLY1. DRIVER’S SEATCAUTION:Before assembling, make sure how the harnesses such as the side airbag harness and the seat belt inner - front harness are routed in order ...
 Installation
SEATS > Front SeatINSTALLATIONInstall each part in the reverse order of removal.CAUTION:• The front seat mounting bolts differ between the front mounting points and the rear mounting points. ...
Other materials:
Dtc c1512 valve system
VEHICLE DYNAMICS CONTROL (VDC) (DIAGNOSTICS) > Diagnostic Procedure with Diagnostic Trouble Code (DTC)DTC C1512 VALVE SYSTEMNOTE:For the diagnostic procedure, refer to “DTC C1362 NORMAL CLOSING VALVE 2”. Diagnostic Procedure with Diagnostic Trouble Code (DTC) > DTC C1362 NORMAL CL ...
Remote engine start system Wiring diagram
WIRING SYSTEM > Remote Engine Start SystemWIRING DIAGRAM ...
Installation
CONTINUOUSLY VARIABLE TRANSMISSION(TR580) > Parking PawlINSTALLATION1. Set the range select lever to the “N” range.2. Install the parking pawl shaft, return spring and parking pawl.NOTE:Make sure that the end of return spring sticks out of parking pawl as shown in (a). Make sure that ...
