Subaru Crosstrek Service Manual: Inspection
CONTINUOUSLY VARIABLE TRANSMISSION(TR580) > Inhibitor Switch
INSPECTION
When the driving condition or starter motor operation is improper, first check the shift linkage for improper operation. If the shift linkage is functioning properly, check the inhibitor switch.
1. Remove the clip (A) from the air intake boot.
2. Loosen the clamp (B) connecting the air intake boot and air cleaner case (rear).
3. Loosen the clamp (C) which connects the air intake boot and throttle body.
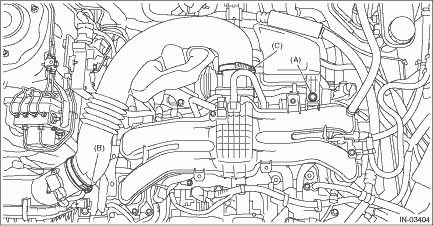
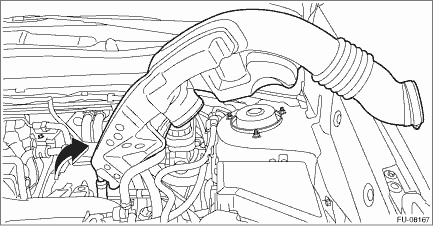
4. Remove the air intake boot from the throttle body, and move it to the left side wheel apron.
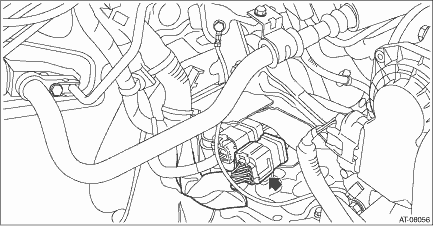
5. Disconnect the inhibitor harness connector.
6. Check for continuity in inhibitor switch circuit by shifting the select lever in “P”, “R”, “N” and “D” respectively.
NOTE:
• Check that there is no continuity in the starter circuit when the select lever is in the “R” and “D” ranges.
• When inhibitor switch is normal, check there is no poor contact in vehicle side connector and no open circuit in harness.
Signal sent to TCM | Range | Terminal No. |
P | 1 — 7 | |
R | 2 — 7 | |
N | 3 — 7 | |
D | 4 — 7 | |
Starter circuit | P/N | 15 — 16 |
Back-up light circuit | R | 13 — 14 |
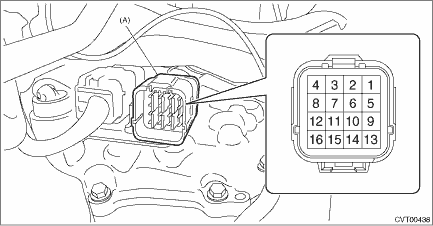
(A) | Inhibitor harness connector |
7. Check that there is continuity at equal points when the select lever is moved 1.5° in both directions from the “N” range.
If there is continuity in only one direction or in other points, adjust the inhibitor switch. Inhibitor Switch > ADJUSTMENT">
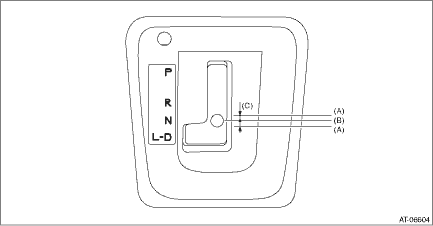
(A) | Continuity does not exist. |
(B) | Continuity exists. |
(C) | 1.5° |
8. Repeat the above inspection in other gear ranges. If there is fault, adjust the inhibitor switch and select cable. Inhibitor Switch > ADJUSTMENT"> Select Cable > ADJUSTMENT">
 Removal
CONTINUOUSLY VARIABLE TRANSMISSION(TR580) > Inhibitor SwitchREMOVAL1. Shift the select lever to “N” range.2. Disconnect the ground cable from battery. NOTE">NOTE:For model with ...
 Installation
CONTINUOUSLY VARIABLE TRANSMISSION(TR580) > Inhibitor SwitchINSTALLATION1. Install the inhibitor switch to the transmission case temporarily.2. Connect the inhibitor harness connector to the inhibi ...
Other materials:
Installation
EyeSight > Stereo CameraINSTALLATIONCAUTION:• Do not remove the protective cover until just before installing the stereo camera cover assembly. Using the bolt and nut, install the stereo camera with the protective cover attached, connect the connectors, and then remove the protective cover. ...
Inspection
ENTERTAINMENT > Navigation SystemINSPECTION1. BASIC INSPECTION1. Using the Check List for Interview, ask the customer the condition of how the trouble occurred. Check List for Interview > CHECK">2. Check the battery. Battery > INSPECTION">3. Check the list of Diagnostics w ...
Disassembly
BRAKE > Rear Disc Brake AssemblyDISASSEMBLYCAUTION:Be careful not to allow foreign matter to enter the brake hose connector.1. Remove mud and foreign matter from the caliper body assembly.2. Remove the piston boot from caliper body cylinder.3. Remove the piston - disc brake.(1) Place a wooden blo ...
